Mt. Whitney is the crown jewel of the sierra nevadas and highest point in the contiguous United States. The summit is reached by a spectacular and grueling 22-mile round-trip. We set out to do it in 2 days with an overnight at Trail Camp. This was our first summit of Mt. Whitney and an experience that we will never forget. If you’re interested in hiking the mountain this guide will give you everything you need to know to climb Mt. Whitney.
A quick look at Mt. Whitney Trail
Country: USA
State: California
Distance: 21.7 miles
Elevation Gain: 6,663 feet
Trail Type: Out and Back
Time to Complete: 16-18 hours
Best Month to Visit: August
Mt. Whitney Wilderness Permit and Lottery
All hikers require a Mt. Whitney wilderness permit for day use and overnight hikes. For hikes during the quota season, which runs from May 1st to November 1st, you must enter the permit lottery. The lottery application window opens on February 1st and closes on March 1st and results are published on March 15th. When applying for the lottery you can list up to 10 alternate trip dates so if you live in the USA you can be more flexible with the dates.
Outside of the quota season permits are still required but are not subject to the lottery or daily limits.
Mt Whitney wilderness permits and lottery are booked online here. It cost $6 to enter the loytery and $15 for the wilderness permit. Lottery results will be posted on your recreation.gov account on March 15th. You must complete the reservation details and pay the fee by the April 21st deadline or your reservation will be canceled. After the lottery any unclaimed dates will open for reservations on April 22nd so you still have a second chance if you miss out.
How to get to Mt. Whitney Trailhead?
The Mount Whitney Trail begins at Whitney Portal, located on the eastern side of the Sierra Nevada. To get there, drive to Lone Pine, California, which sits directly along Highway 395. From the center of Lone Pine, turn west onto Whitney Portal Road. Drive approximately 13 miles as the road climbs steeply out of the high desert and transitions into the pine-forested mountains. The road ends directly at the trailhead loop. Parking at the portal is limited, so make sure you get there early to avoid disapointment. Most day hikers will arrive the evening before the hike and leave between 01:00AM and 02:00AM
When is the best time to hike Mt. Whitney?
The prime hiking season runs from July through September, when the trail is mostly free of snow and ice. June can be beautiful but often features heavy snowpack at higher elevations, requiring an ice axe and crampons. October brings thin crowds as the temperature cools, but also the looming threat of sudden, severe winter storms. No matter when you go during the summer, afternoon thunderstorms are a serious threat above the tree line.
Jan
Feb
Mar
Apr
May
Jun
Jul
Aug
Sep
Oct
Nov
Dec
Where to stay?
Spending a night or two at high altitude before your hike to help acclimatis and prevent altitude sickness. Whitney Portal Campground, situated at 8,300 feet right near the trailhead, this a really beautiful campground that allows you to get an early morning start. You can book a campsite here, make sure you book well ahead of time as it fills up quick. there are other campgrounds and motels options in nearby Lone Pine provide.
For backpackers breaking the hike into a multi-day trek, Trail Camp at 12,000 feet serves as the primary high-altitude basecamp. Outpost Camp at 10,360 feet offers a more sheltered option but you have alot more ground to cover to reach the summit on day 2. You book the backcountry campsites when applying for the Mt. Whitney wilderness permit.
What to bring on the trail?
What you bring on the trail will depend on the time of year and if you are planning to hike Mt. Whitney in one day or camp overnight at trail camp.
Water Filter: There are no spigots on the trail so all water will need to be sourced from streams and lakes on the trail.
Rain shell: The weather can change quickly so be prepared for rain even if it looks clear.
Sun Protection: Bring along hat, sunscreen and sunglasses as it gets very exposed above the treeline so protect yourself.
Bear Canister: You will need a bear canister to store food and toiletries when camping.
Microspikes & Ice Axe: These are requiIred when the trail is covered in snow and ice during winter and early spting. Tackling the trail in winter is only reccomended to those with mountaineering experience as it can be very dangerous if you dont know how to use the equipment and know how to navigate the snow.
Gear Hire: If you don’t have all the equipment or are travelling from overseas like we did you can hire camping and hiking gear from Bishop where there are some outdoor shops. We hired crampons and camping gear from Eastside Sports in Bishop, we ordered online and collected from the store which was really convenient.
Got a trip coming up? Find fantastic booking options!
Find your dream hotel!
Booking.com offers a range of hotels and guesthouses that fir your style and budget perfectly.
Effortlessly book your flight!
Trip.com allows you to search, compare and book the flights from multiple carriers all in the one place.
Book unforgettable experiences!
Ready to turn your travel dreams into reality? Viator connects you with over 300,000 unforgettable global tours and activities
Mt. Whitney Trail Highlights
Whitney Portal
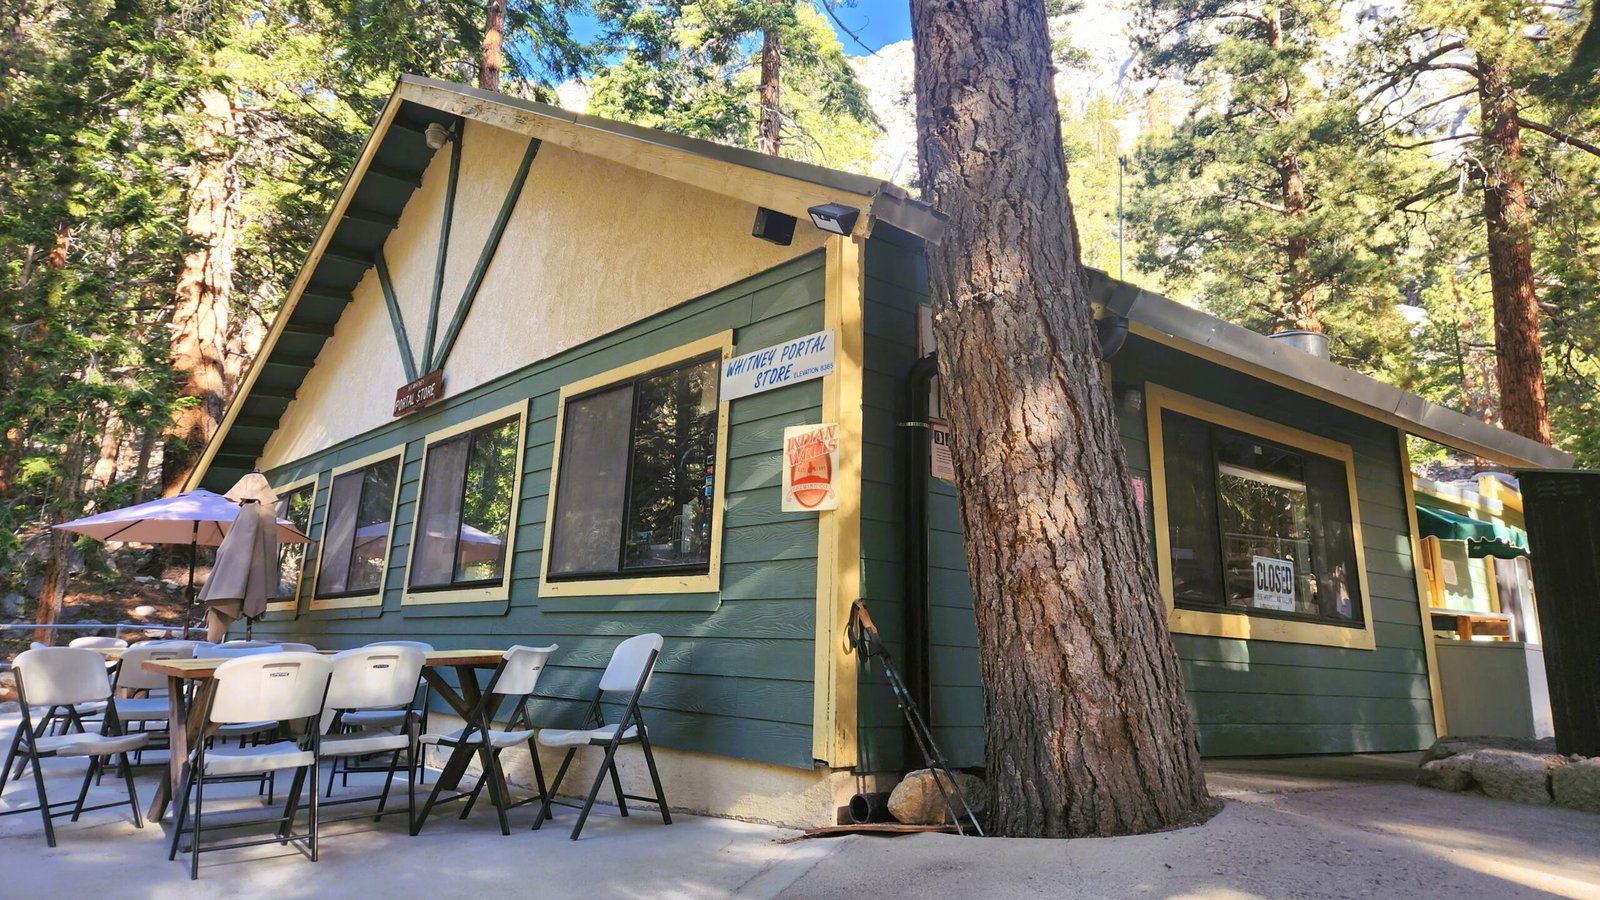
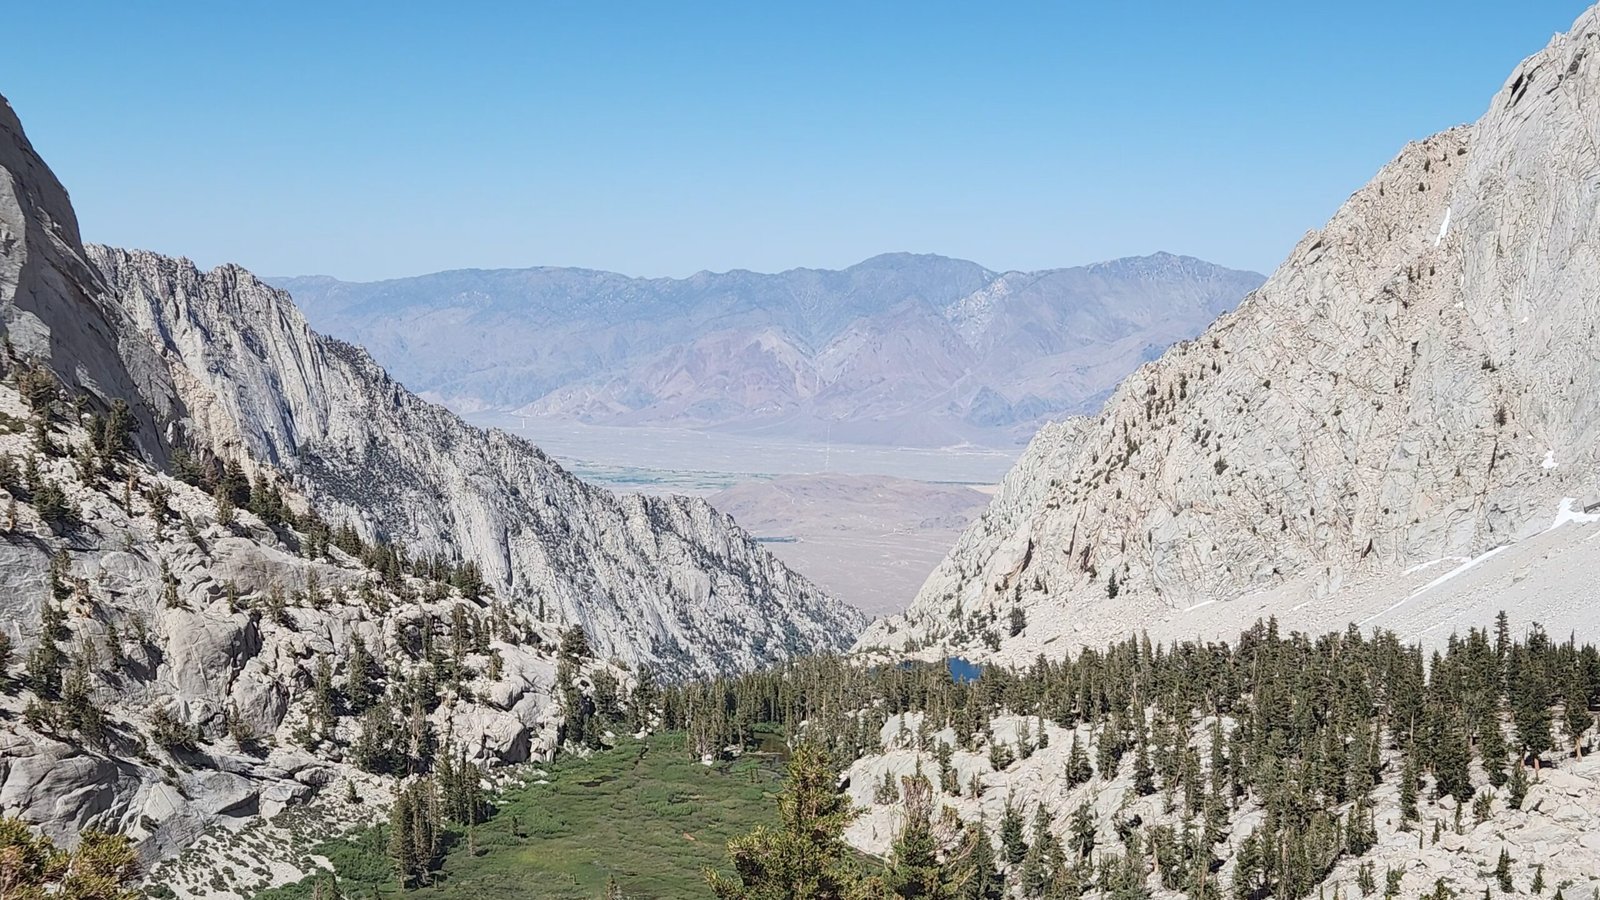
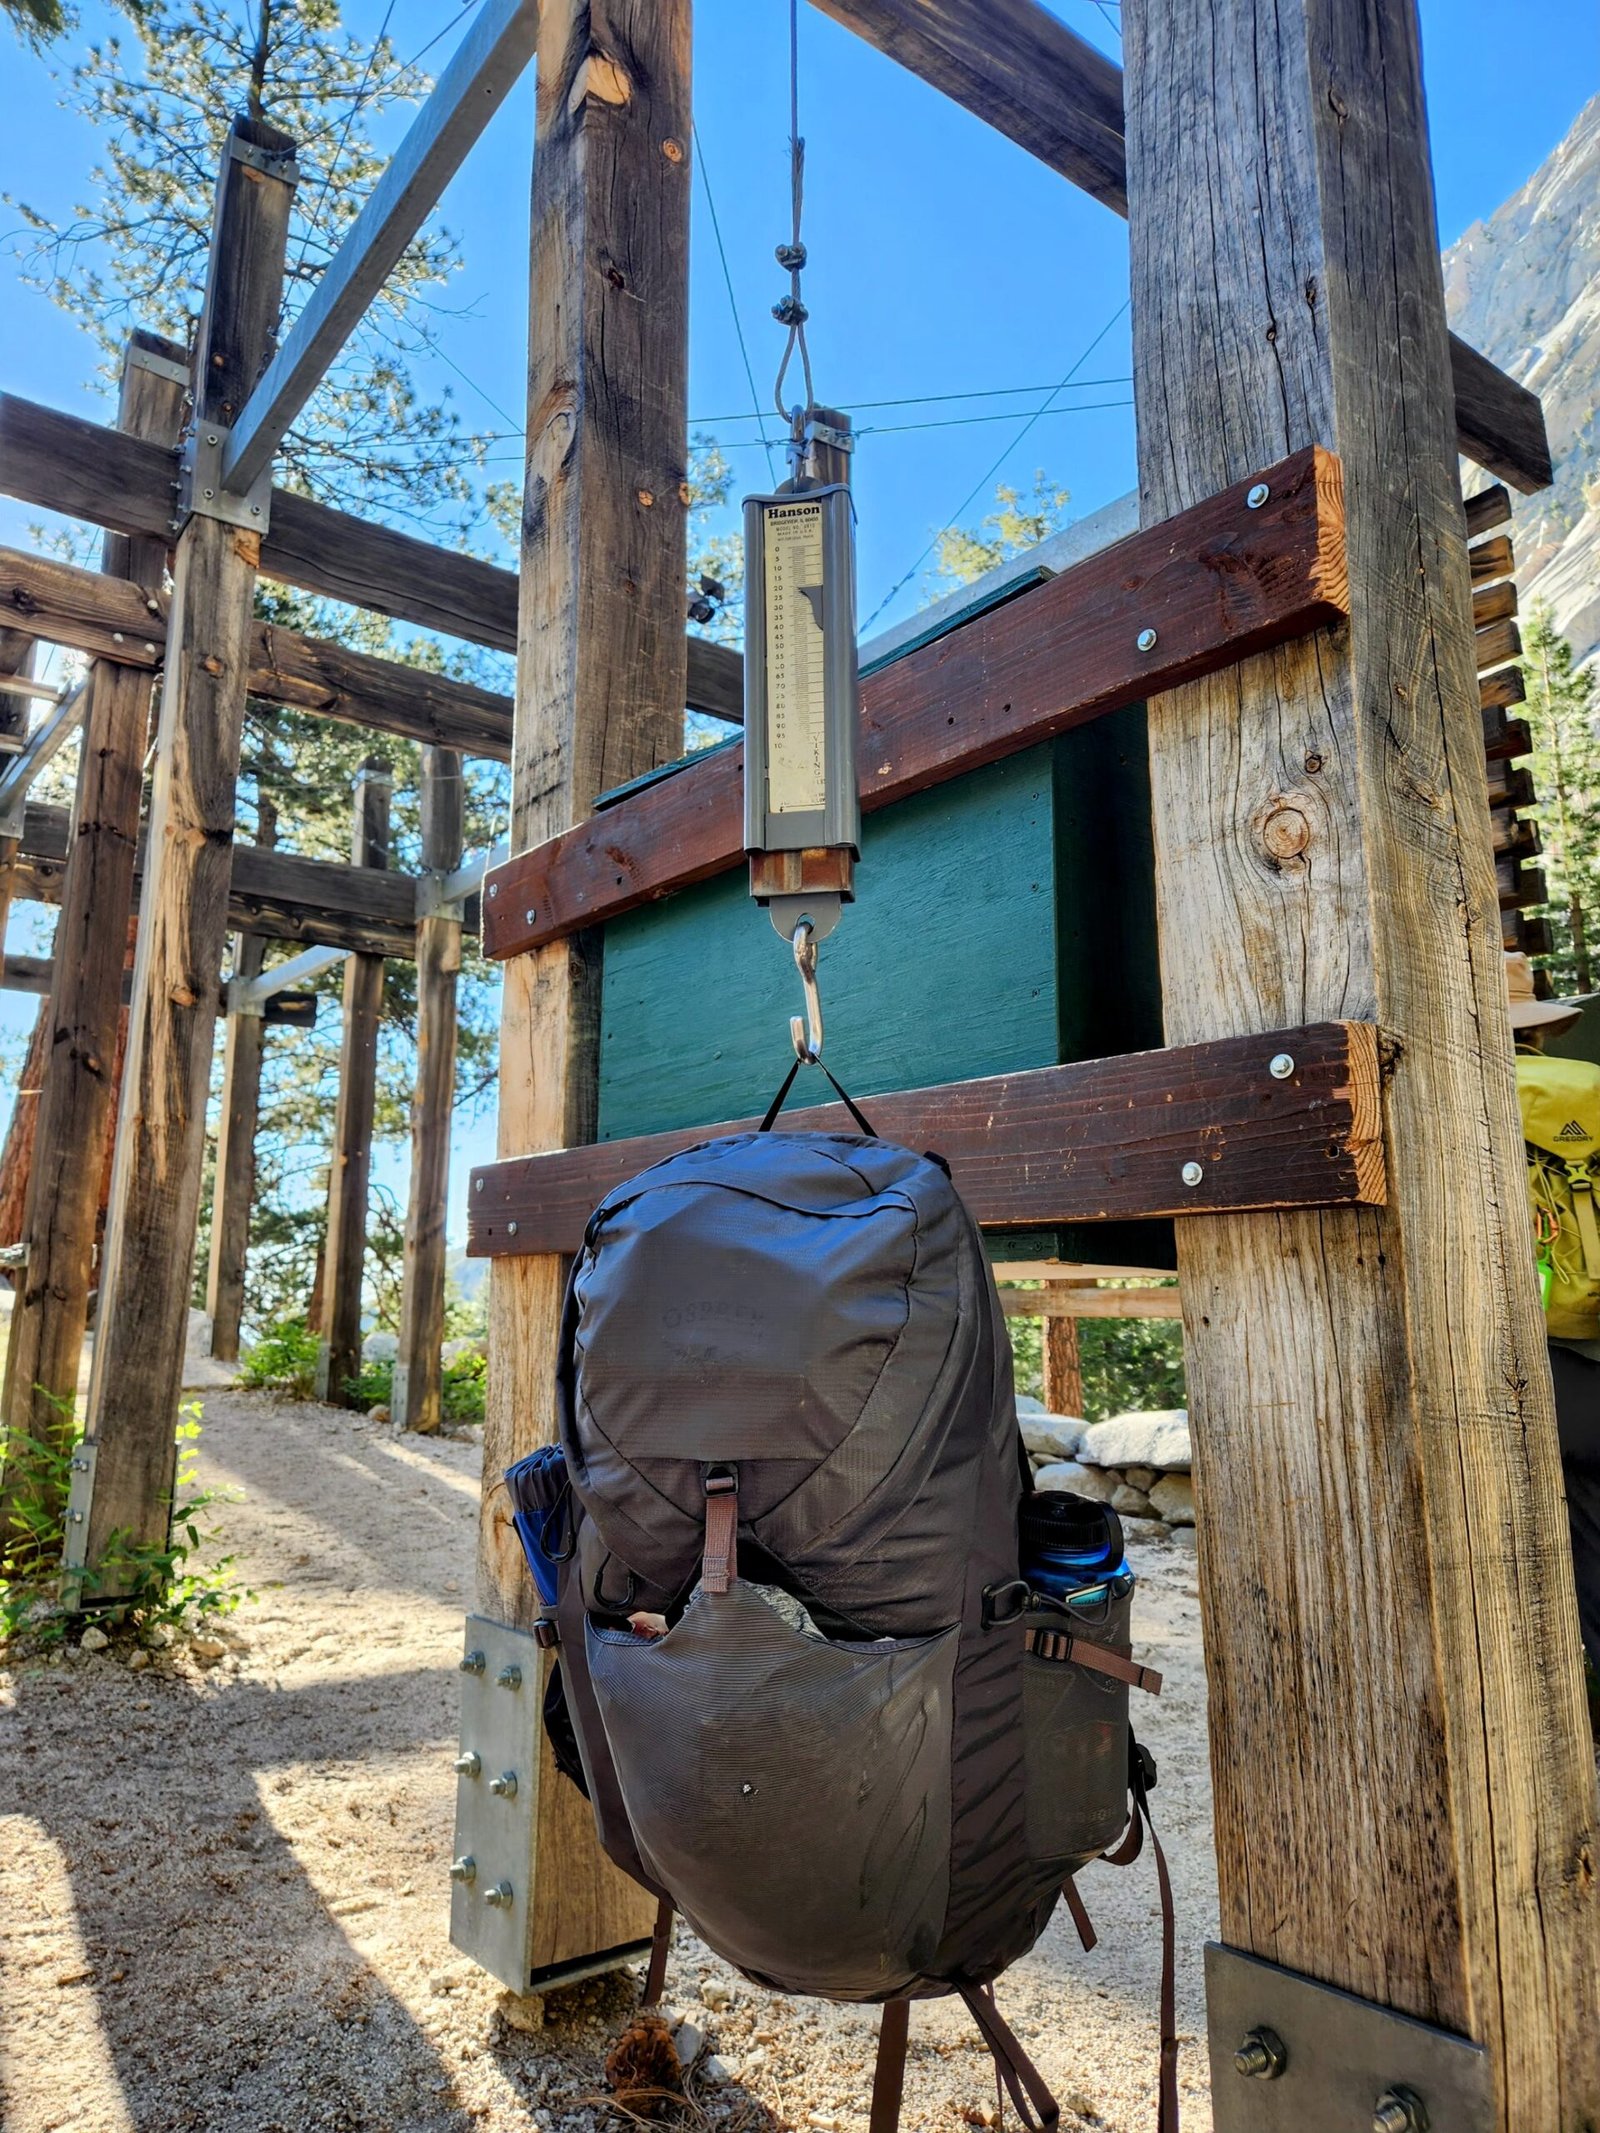
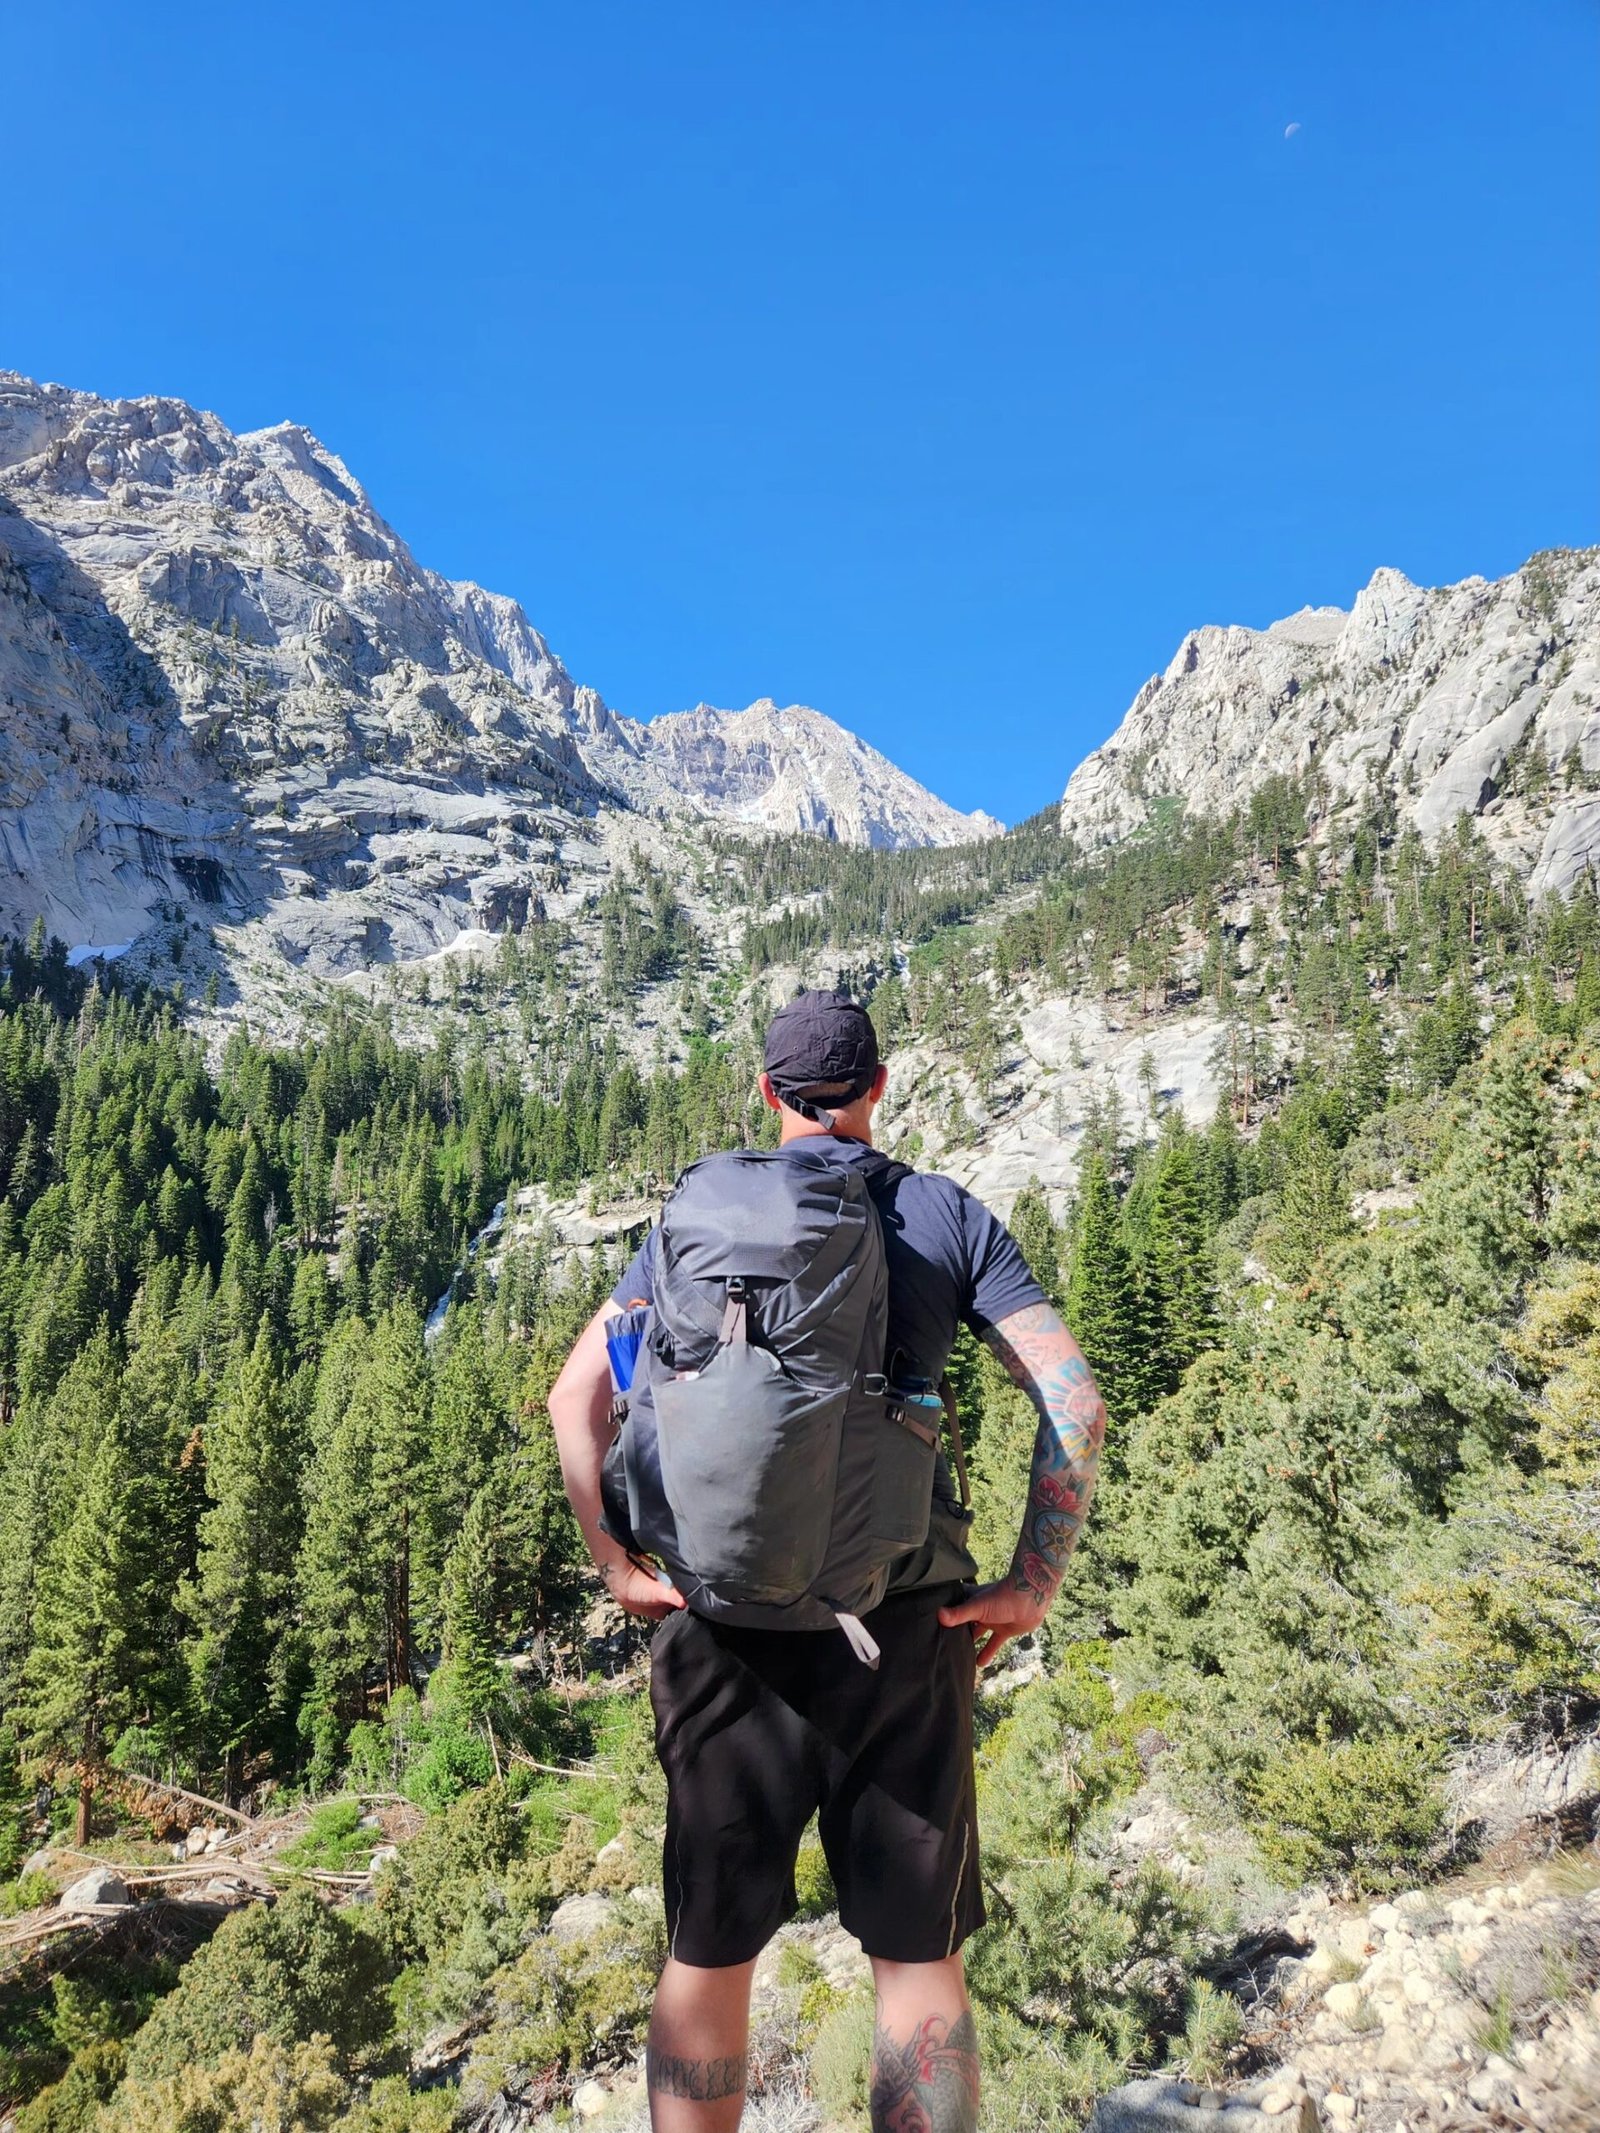
The journey begins at the Whitney Portal, situated at an elevation of 8,360 feet. Day hikers will start their trek in the pre-dawn darkness, often as early as 1:00 or 2:00 AM, to ensure they have plenty of time to reach the summit and descend. Here you will also find the Whitney Portal store that has up to date trail information, souvineers as well as food and drinks. Before you leave stop by the famous weighing station where you can weigh your pack and pick up some wag bags that are used to do your business in on the trail(You need to pack these out with you also). The initial few miles of the trail wind through a lush pine forest, crossing over Lone Pine Creek with loads of long switchback as you quickly gain elevation that also reveal some amazing views.
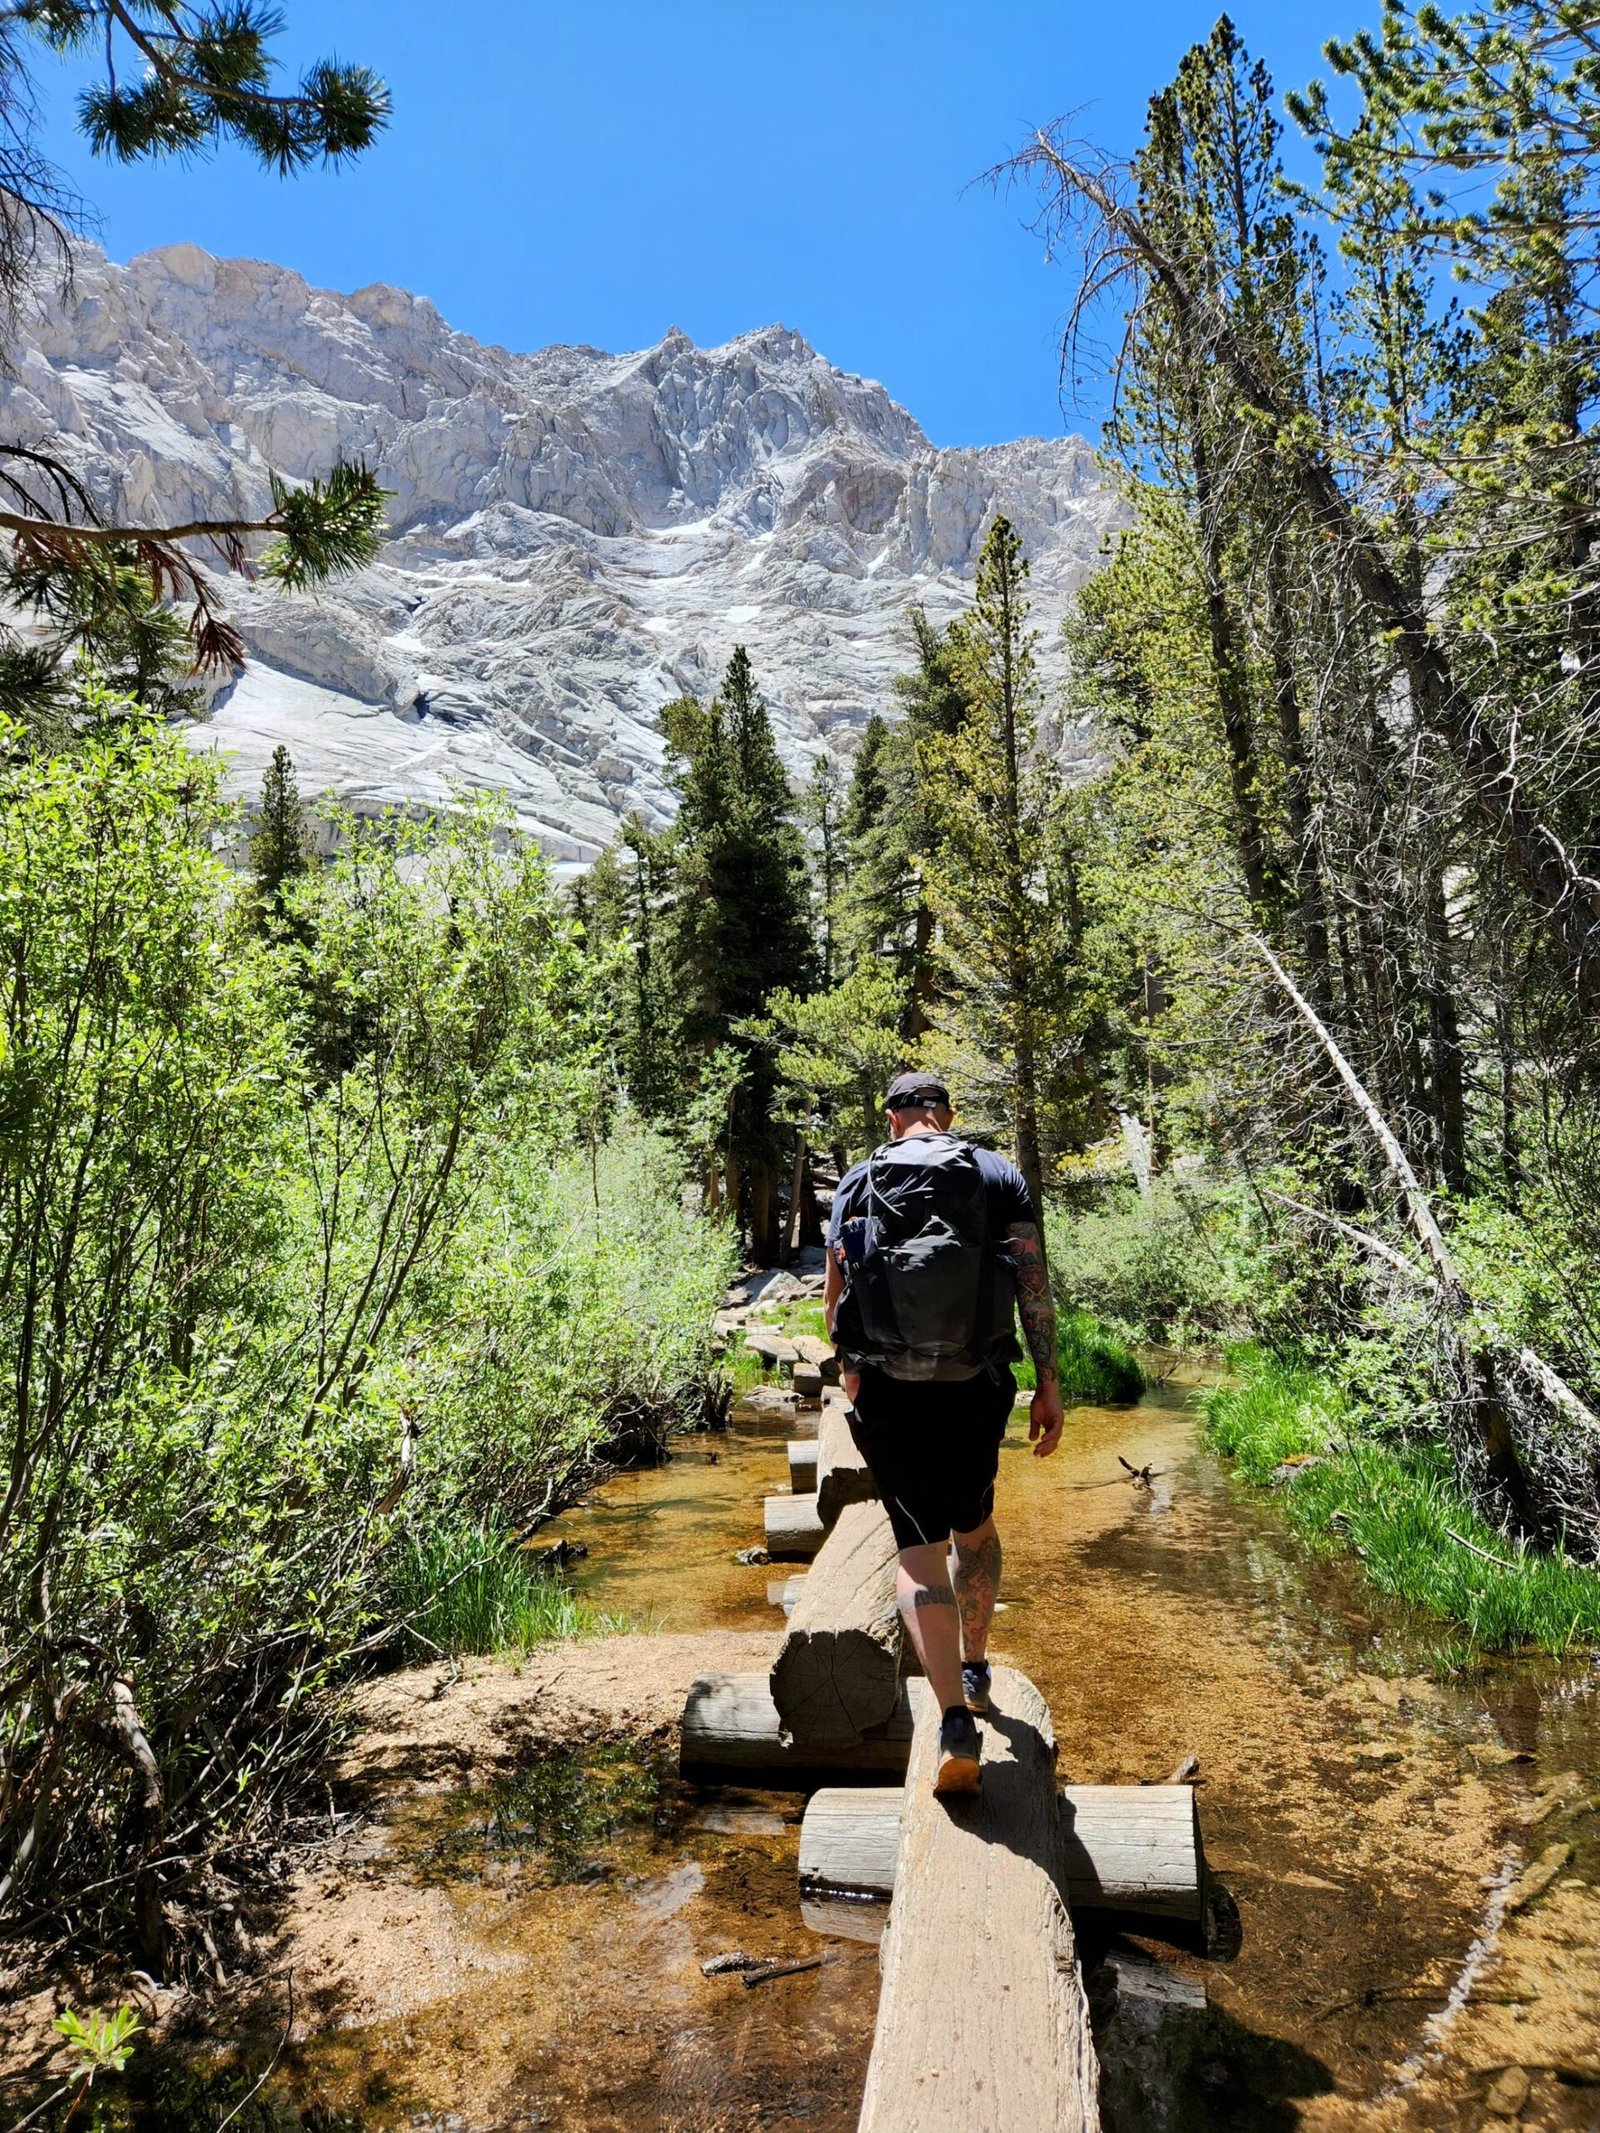
Log Section
Early in the hike, you encounter the famous “Log Section.” This crossing consists of a bunch of logs that form a pathway over a creek. While it requires a bit of balance, the logs are very sturdy and from here you are very close to Lone Pine lake.
Lone Pine Lake
About 2.8 miles in, you reach the junction for Lone Pine Lake. Sitting at roughly 10,000 feet, this is the boundary of the Whitney Zone. Hikers without the Whitney Zone permit must turn back here. The lake offers a stunning reflection of the granite spires above and the perfect spot for a long break or have lunch.

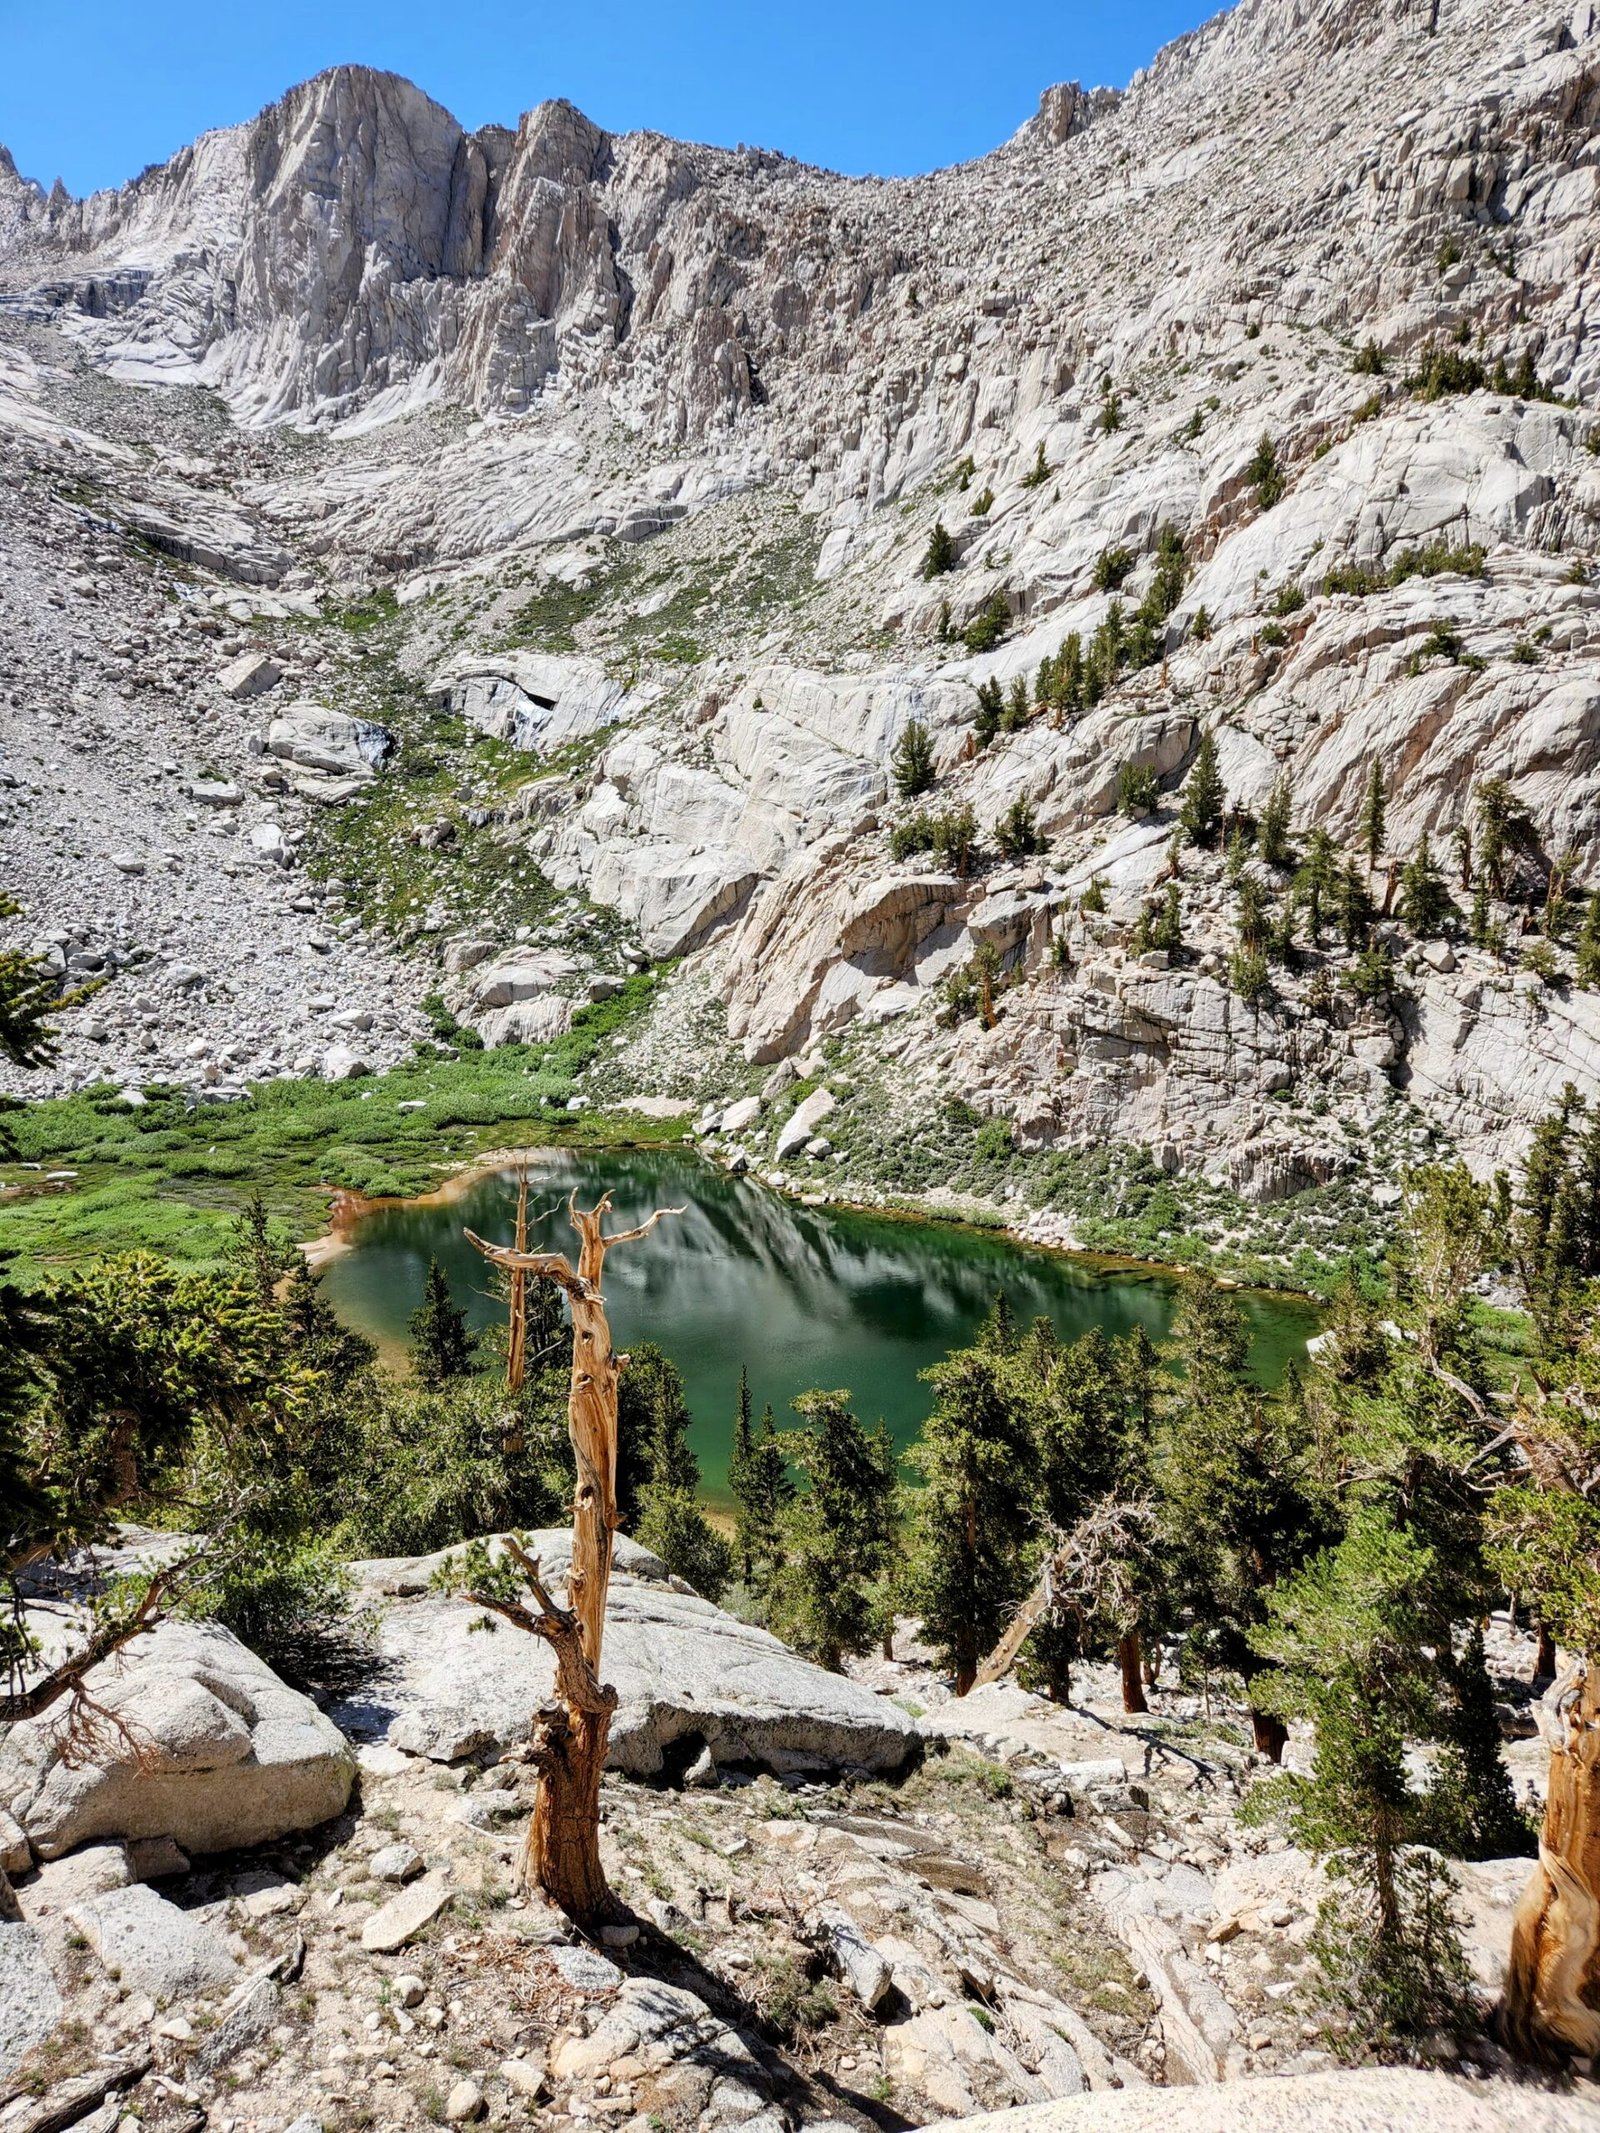
Mirror Lake
Continuing upward, you will pass through a stunning meadow and Outpost camp before reaching Mirror Lake. Don’t forget to look back during this section for some stunning views. Mirror Lake sits at the base of the massive “Wotan’s Throne” and is another great spot to take a rest as the next section becomes rockie, and the grade steepens.
Trailside Meadow
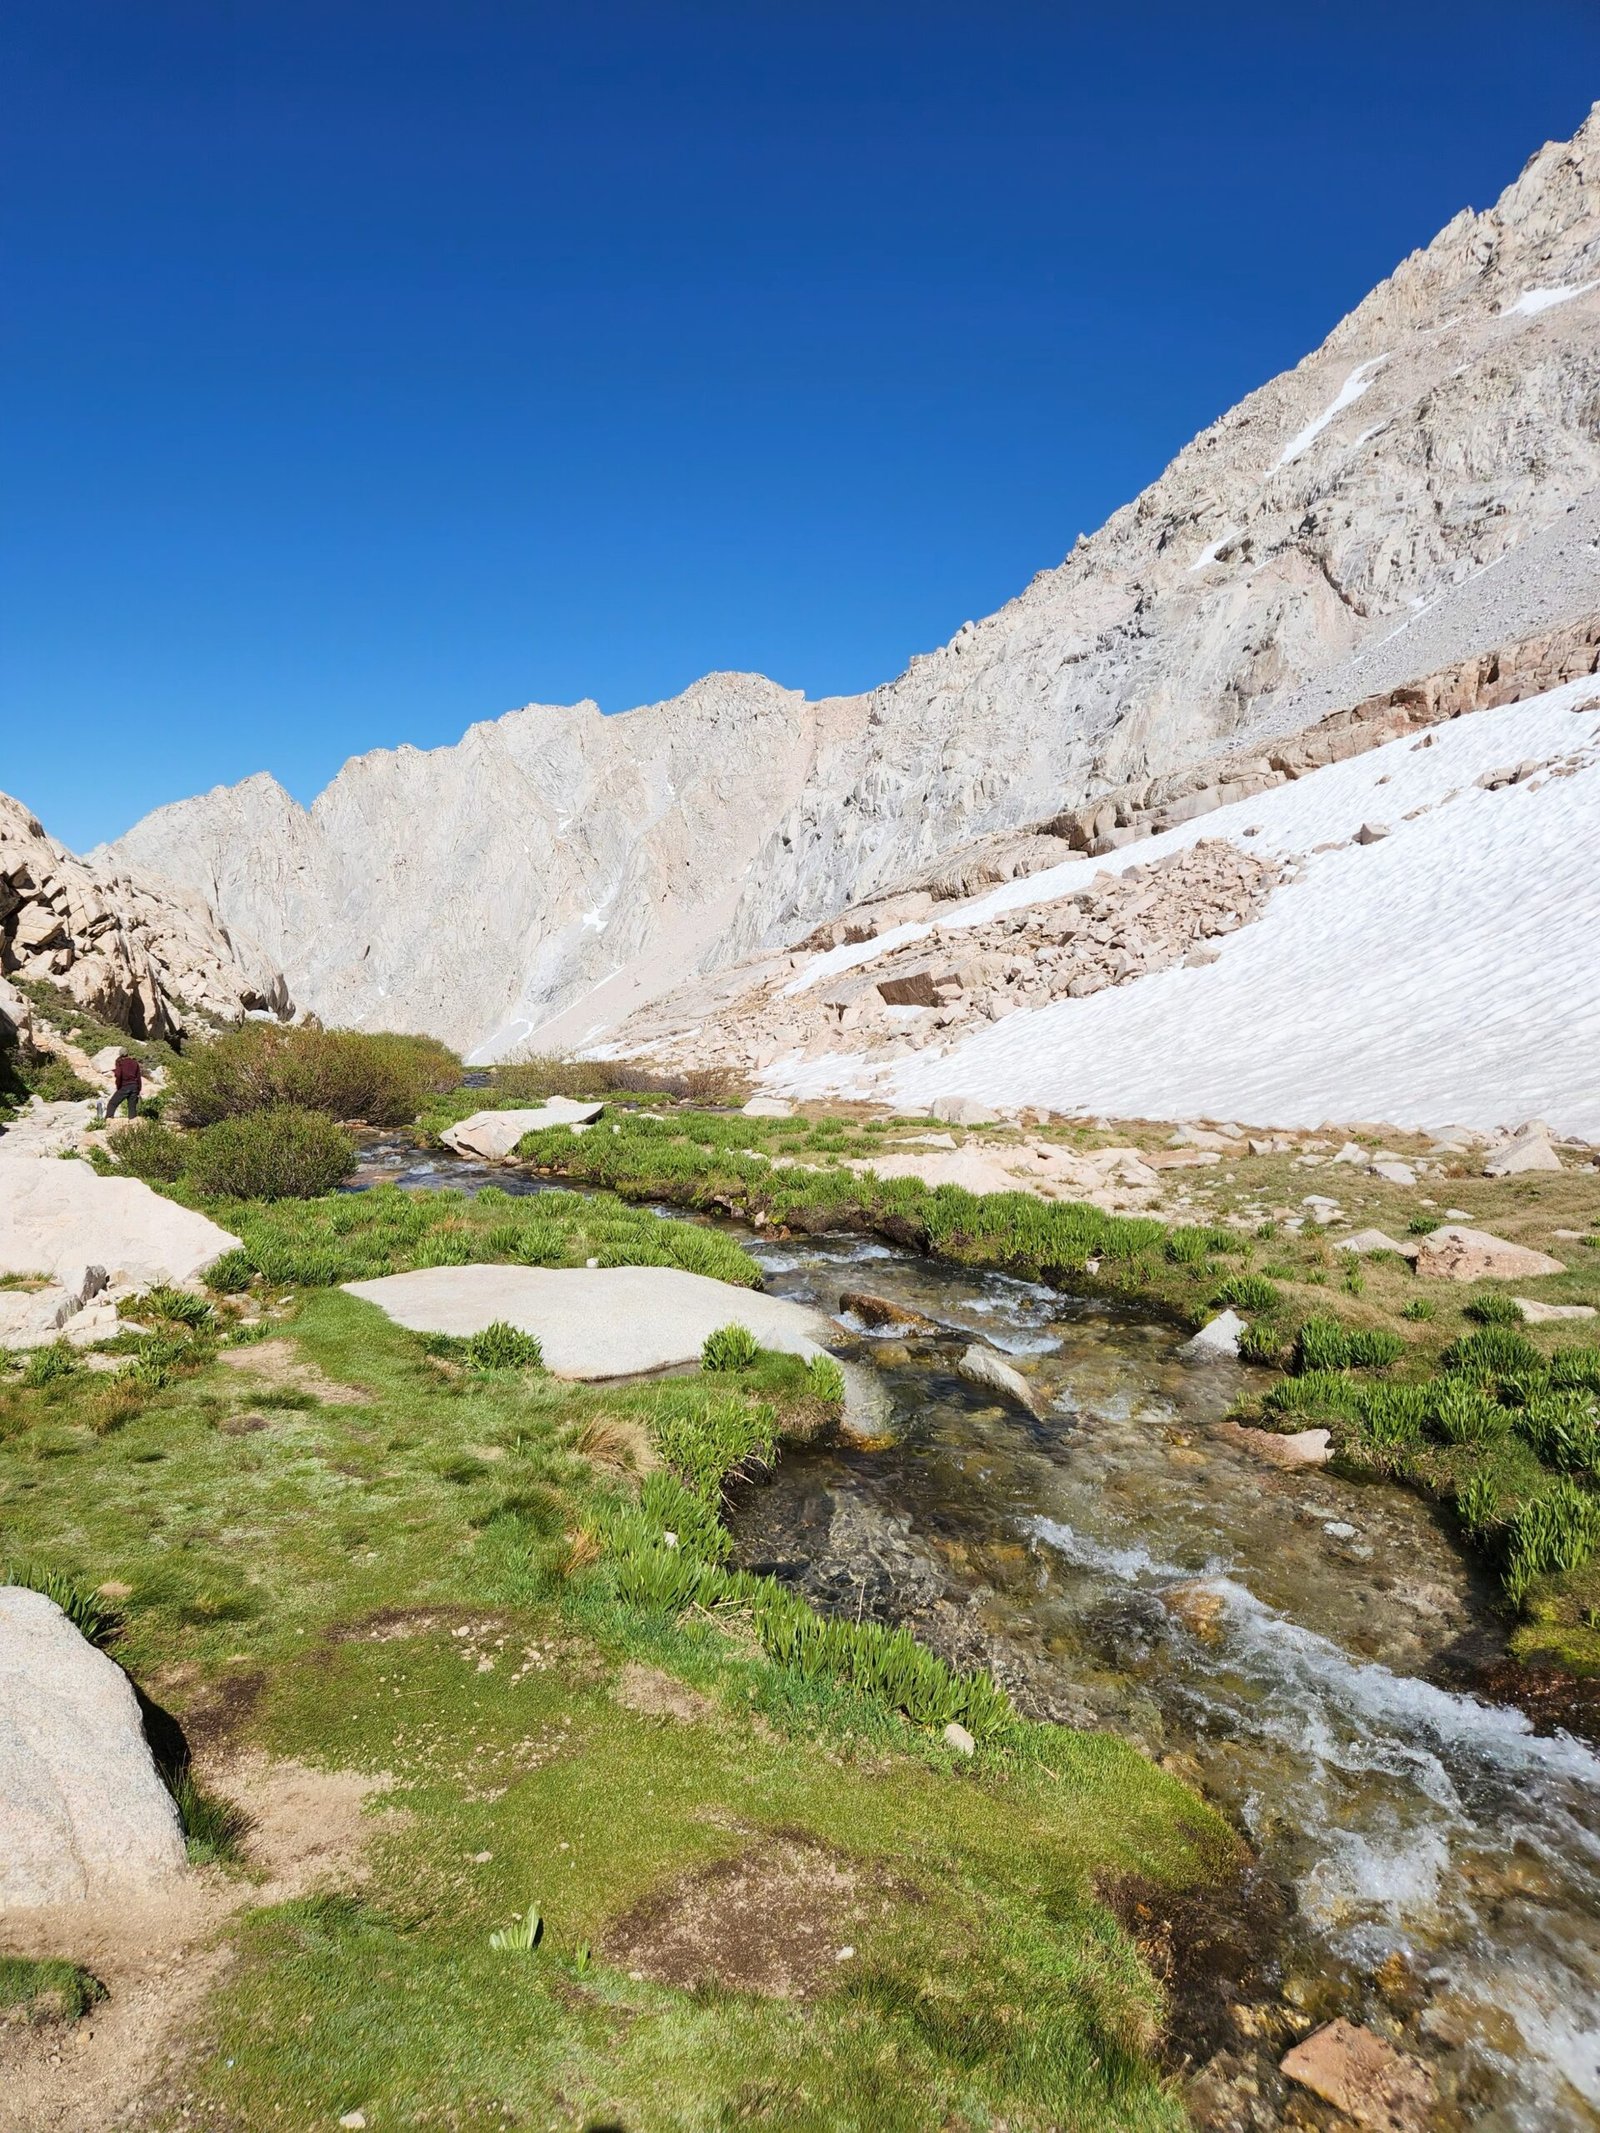
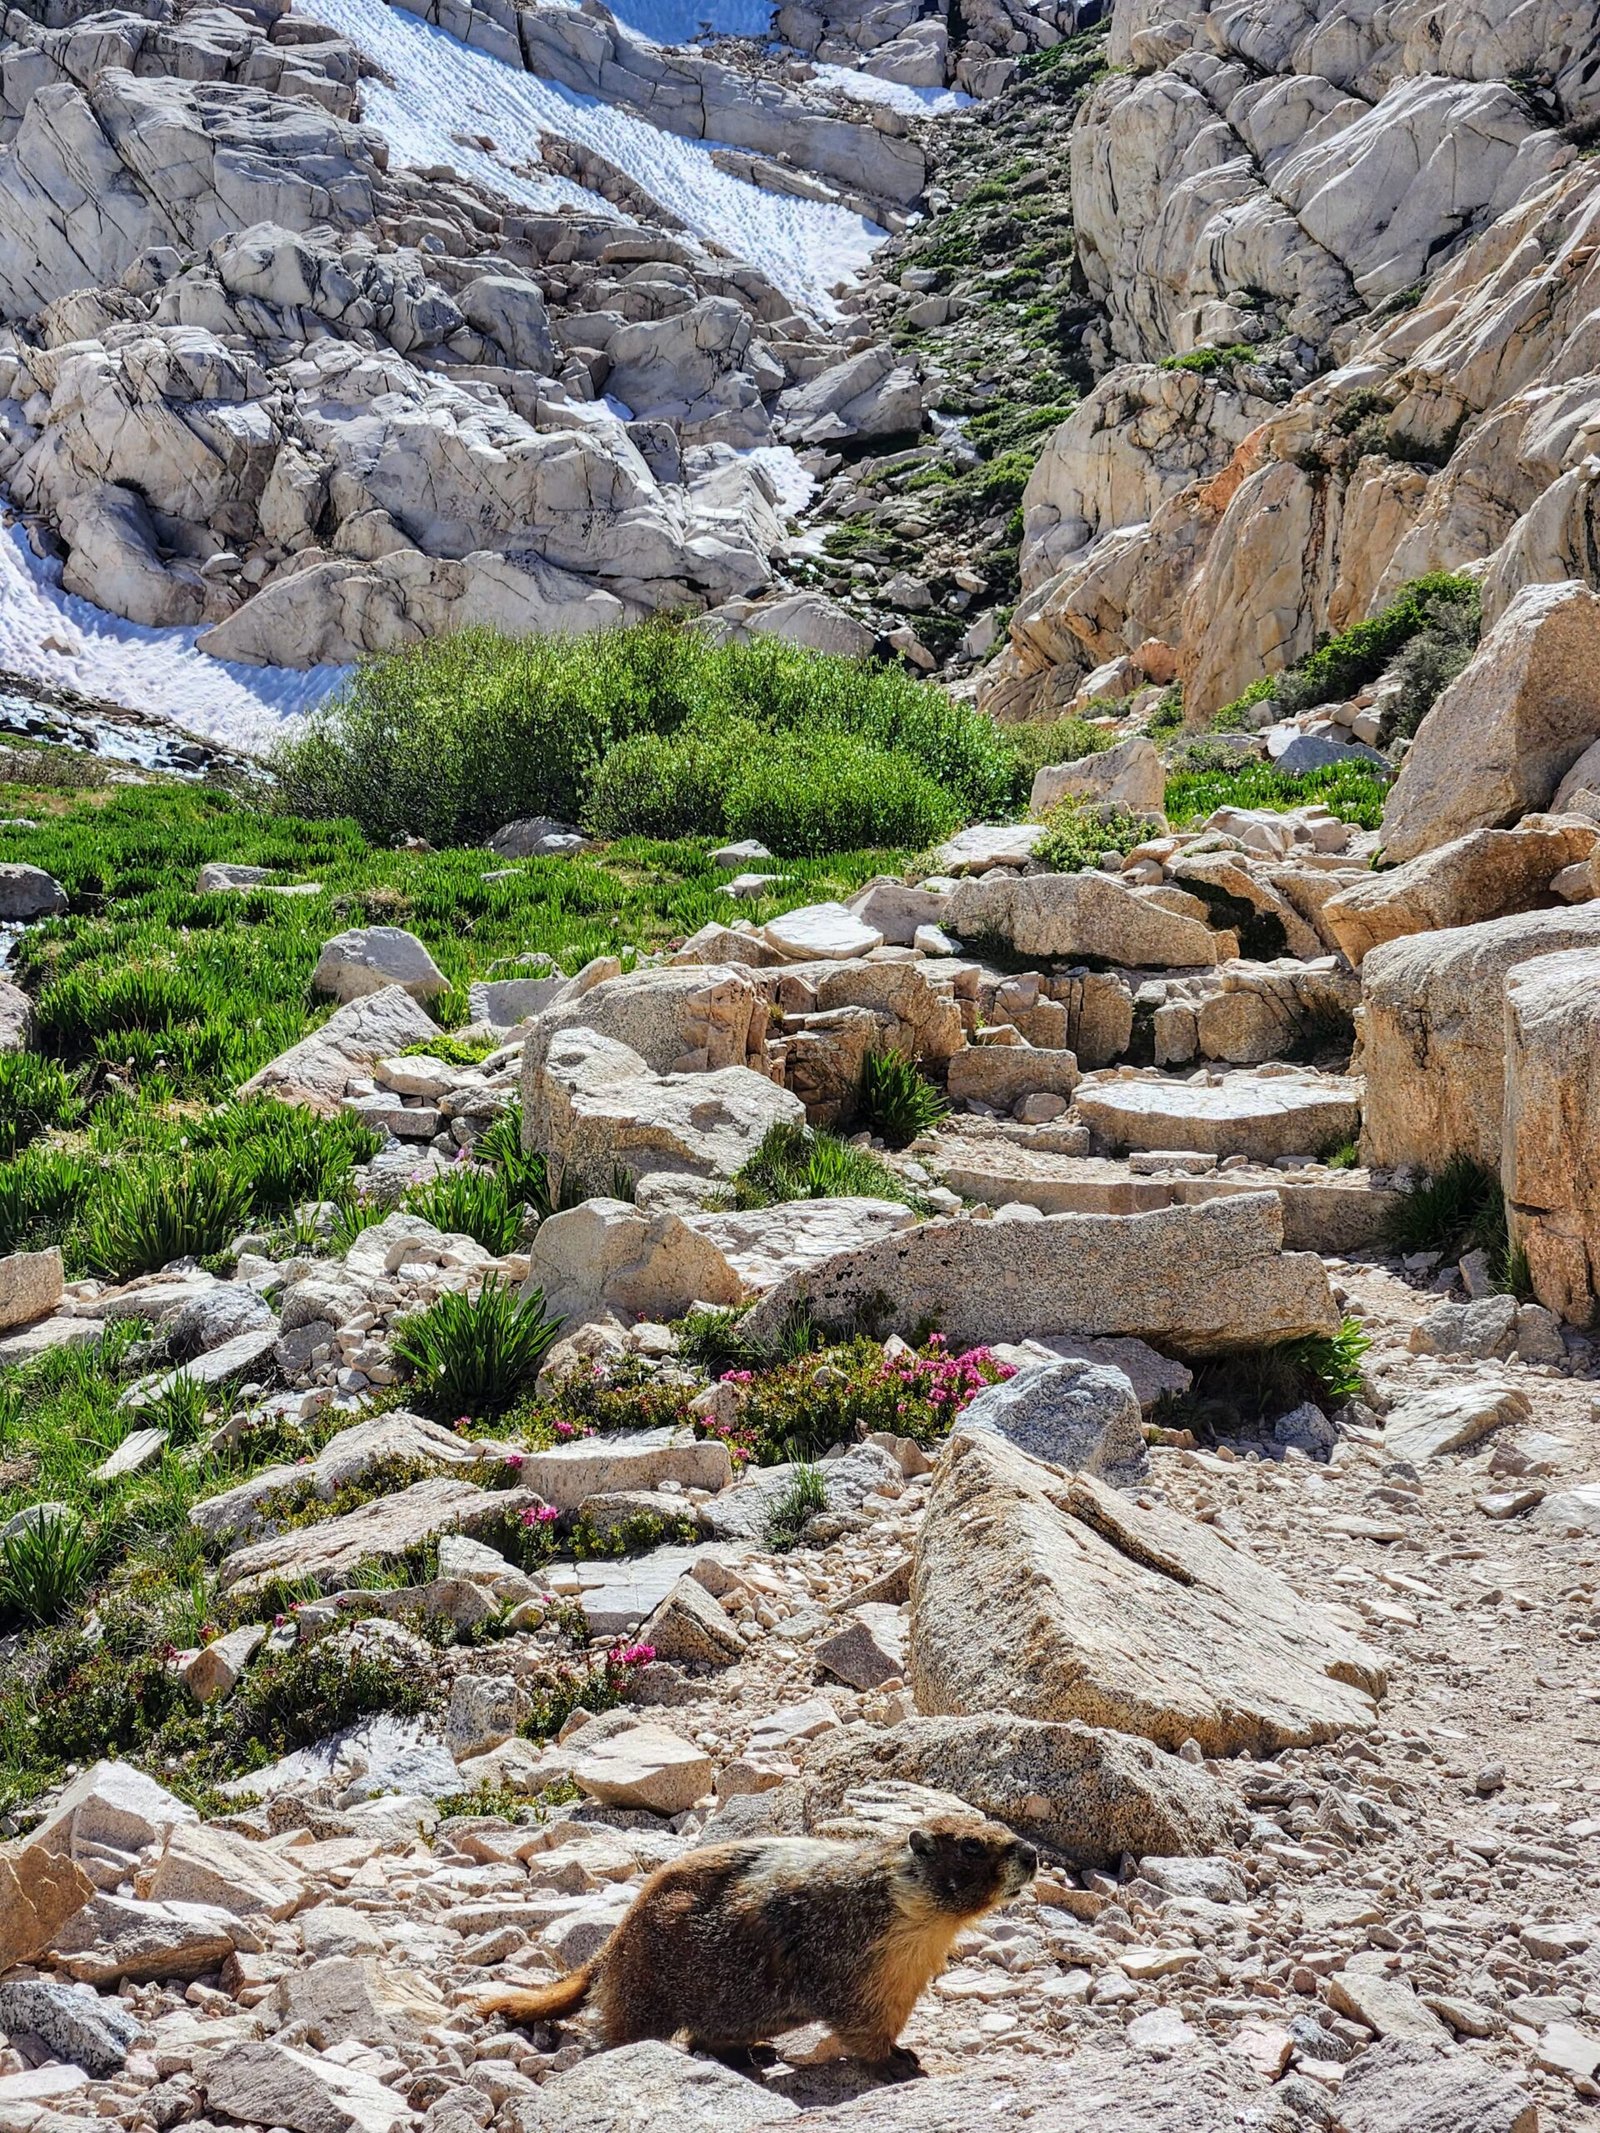
Beyond the lakes lies Trailside Meadow, a small, green oasis amongst the grey granite. Depending on the season, wildflowers bloom and we also saw a bunch of marmots here forraging in the meadow. From here the terrain shifts entirely into a high-alpine moonscape where vegetation struggles to survive. Trailside Meadow is also one of the last reliable places to fill up with water and just a nice place to rest next to the stream.
Trail Camp
Located at 12,000 feet, Trail Camp is the final stop for those who are camping, this is where you set up your tents. On both sides of the trail there are campsites some better than others witth the most prized being the spots closer to the 99 switchbacks. For day hikers, it’s a place to rest and get ready for the toughest test on the trail. This rocky basin is dominated by the sight of the “99 Switchbacks” looming ahead and is the last place to find water at Consultation Lake before the push to the trail crest.


99 Switchbacks
This is the most infamous section of the trail. Rising 1,600 feet over approximately two miles, these switchbacks are a grueling test of endurance. As the oxygen levels drop, every step becomes an effort of will. Near the top, you’ll find a small cable section and depending on the time of year this section requires spikes and ice axe and can even be unpassable. Make sure you check the trail conditions ahead of time to make sure you are prepared as it can be incredibly dangerous.
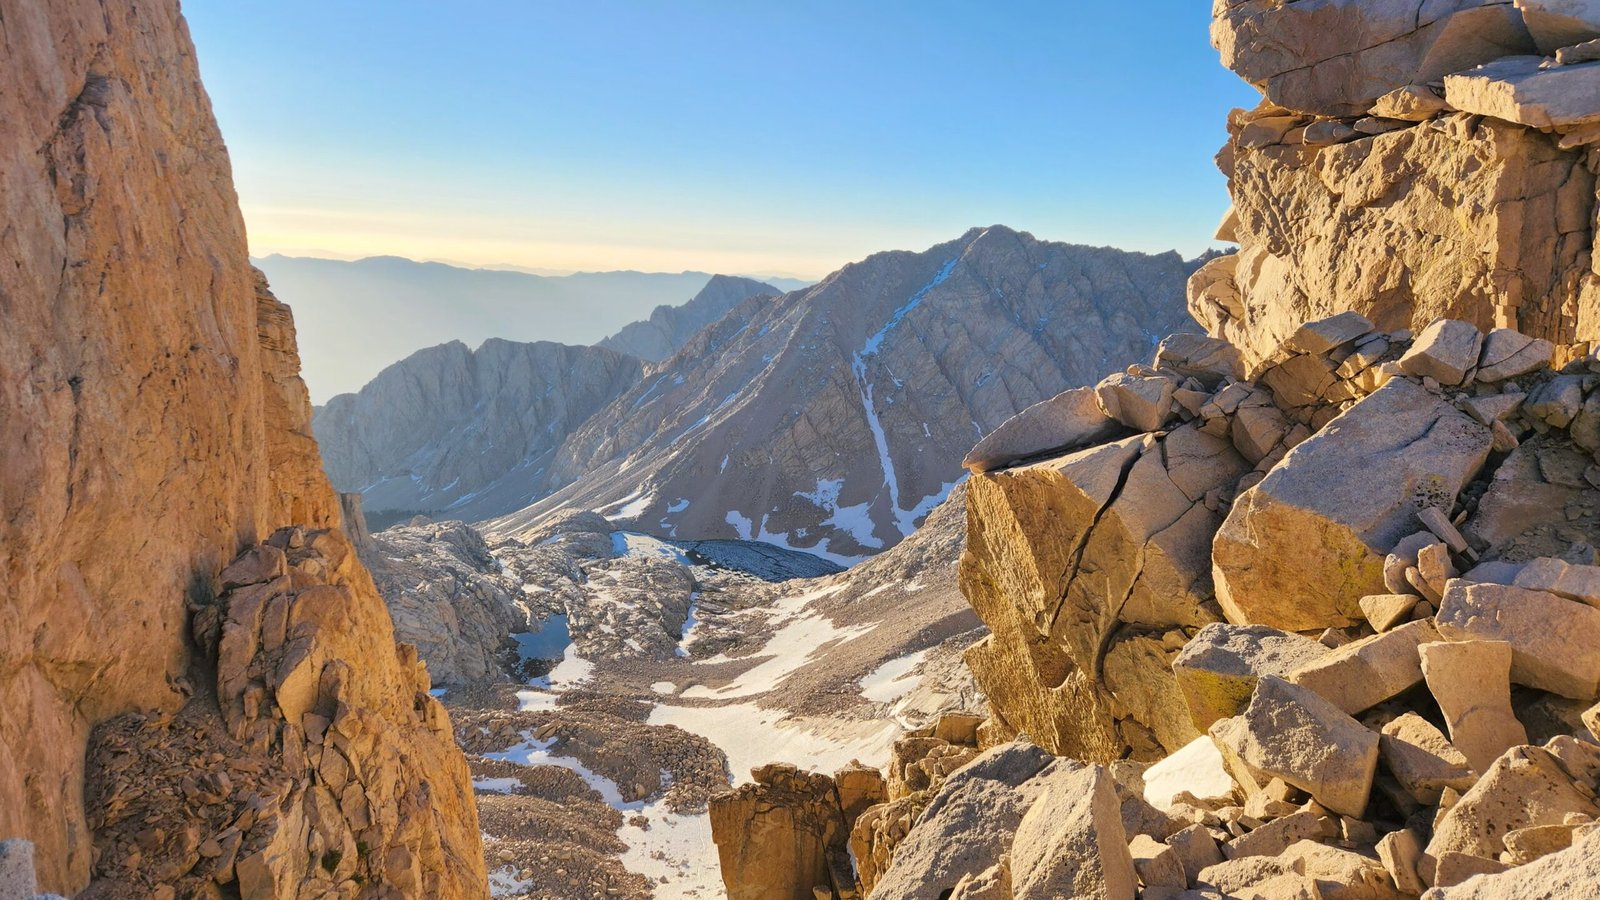
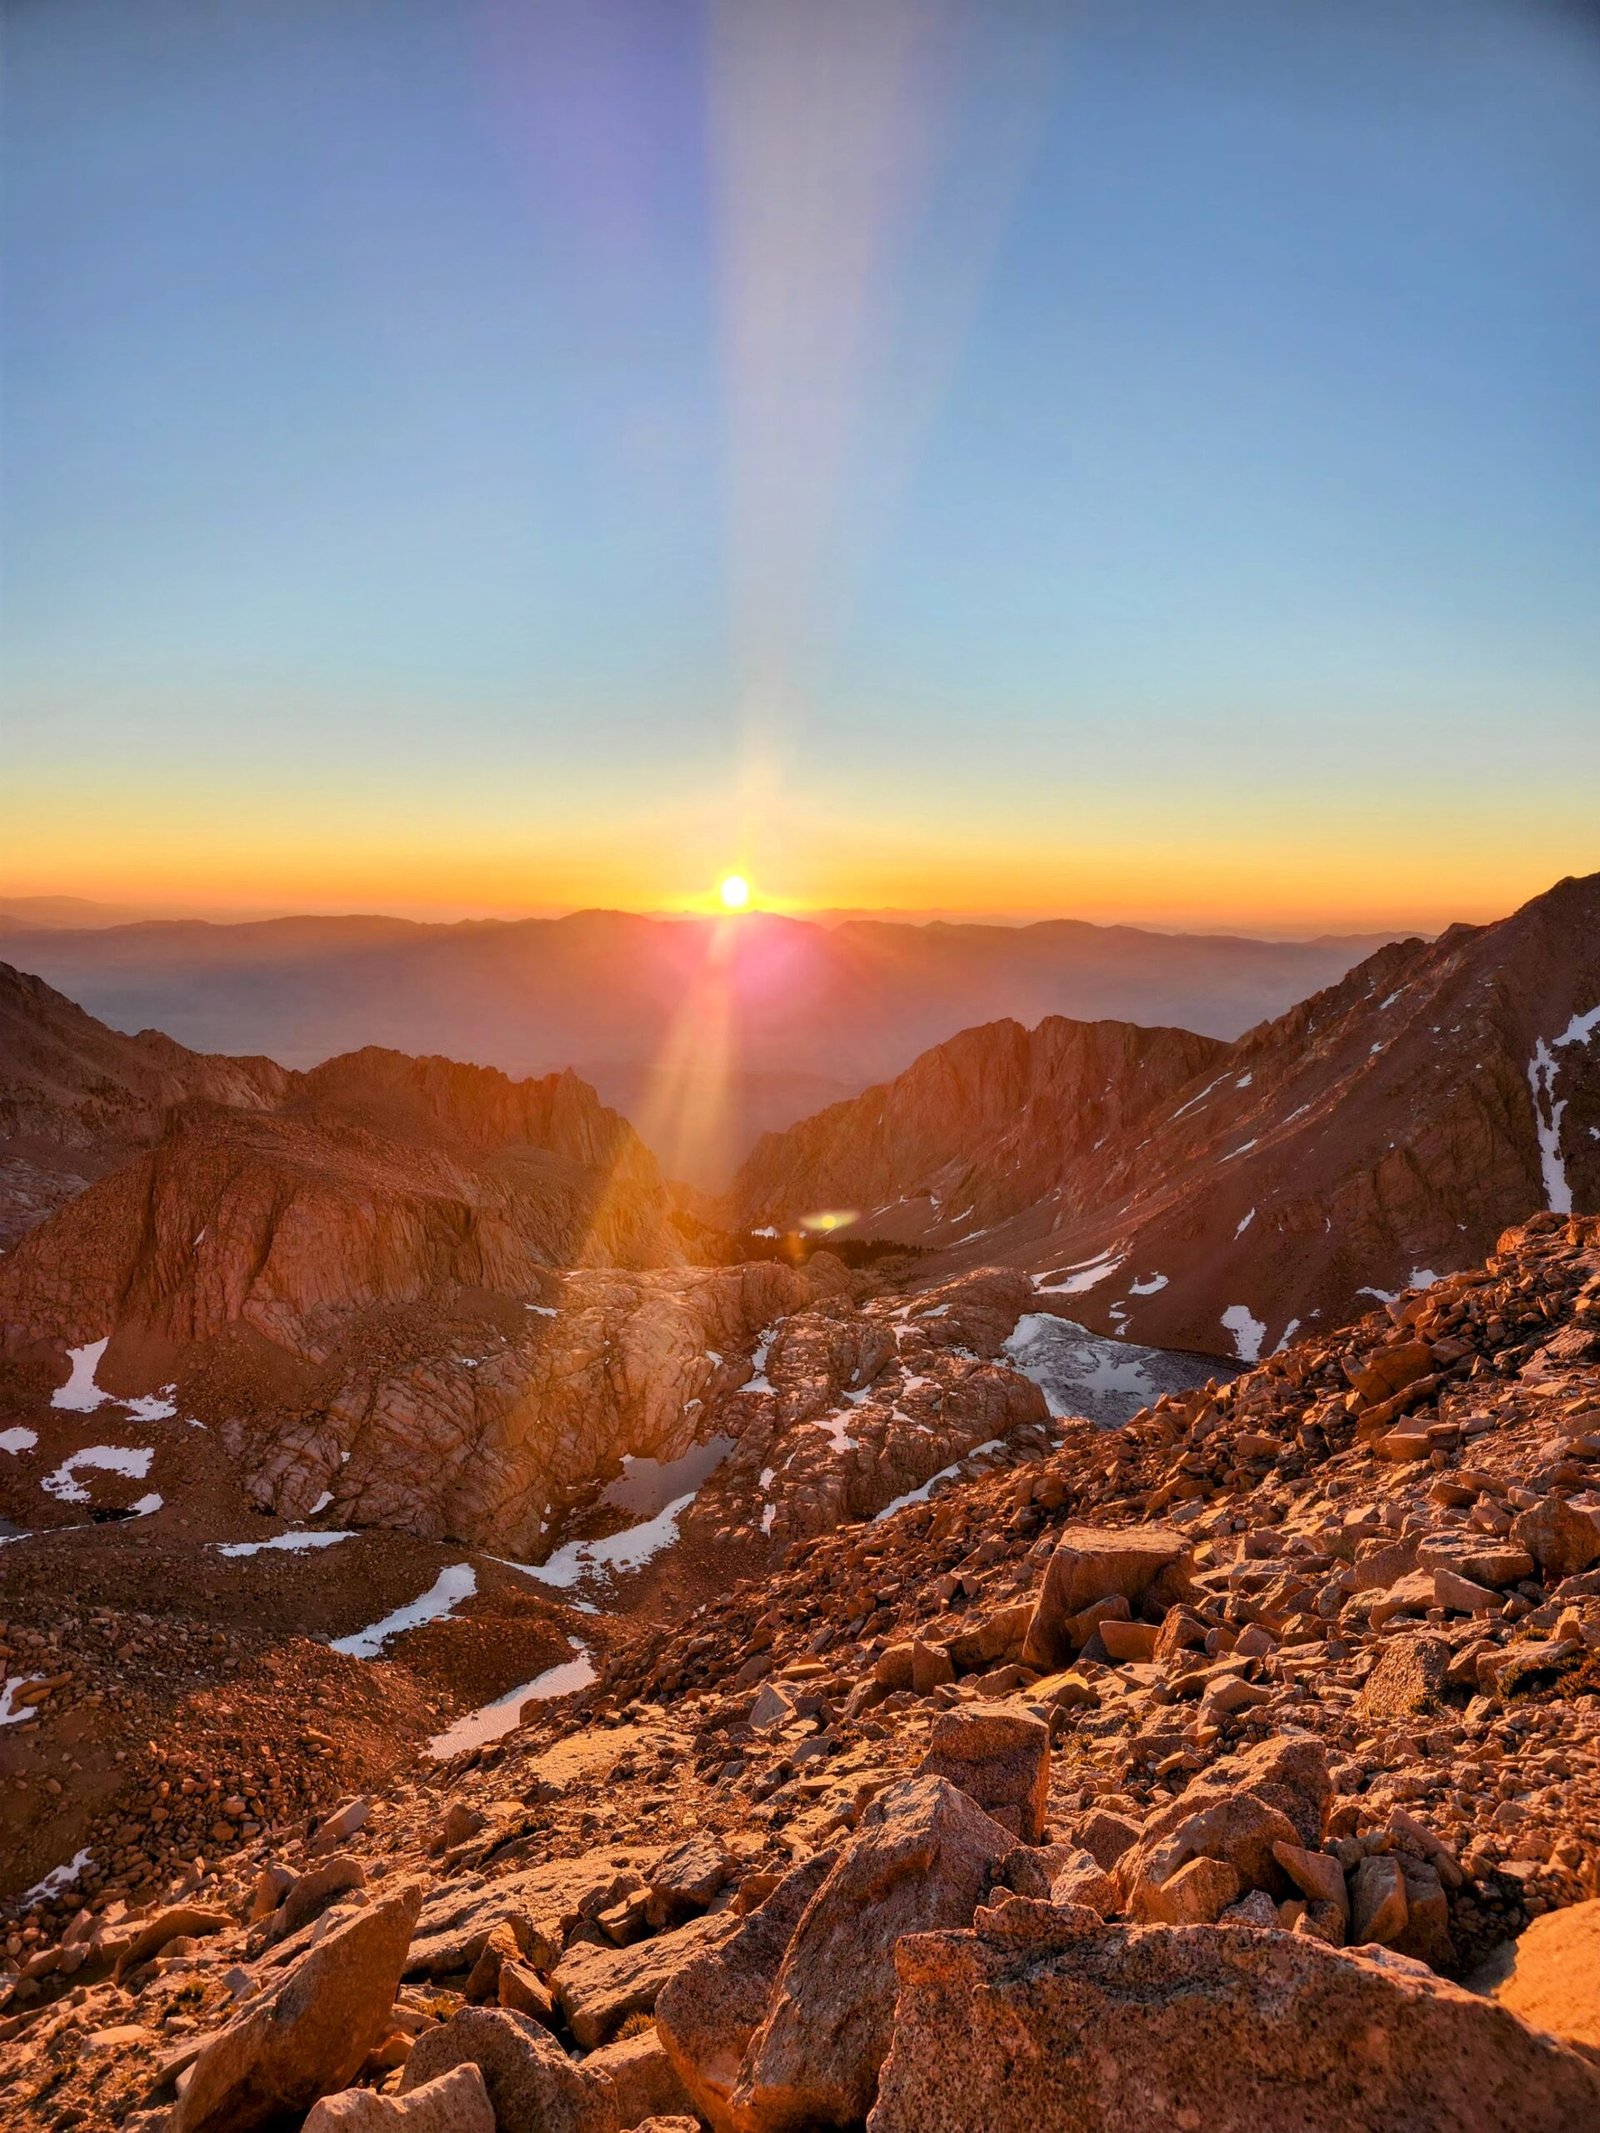
Trail Crest
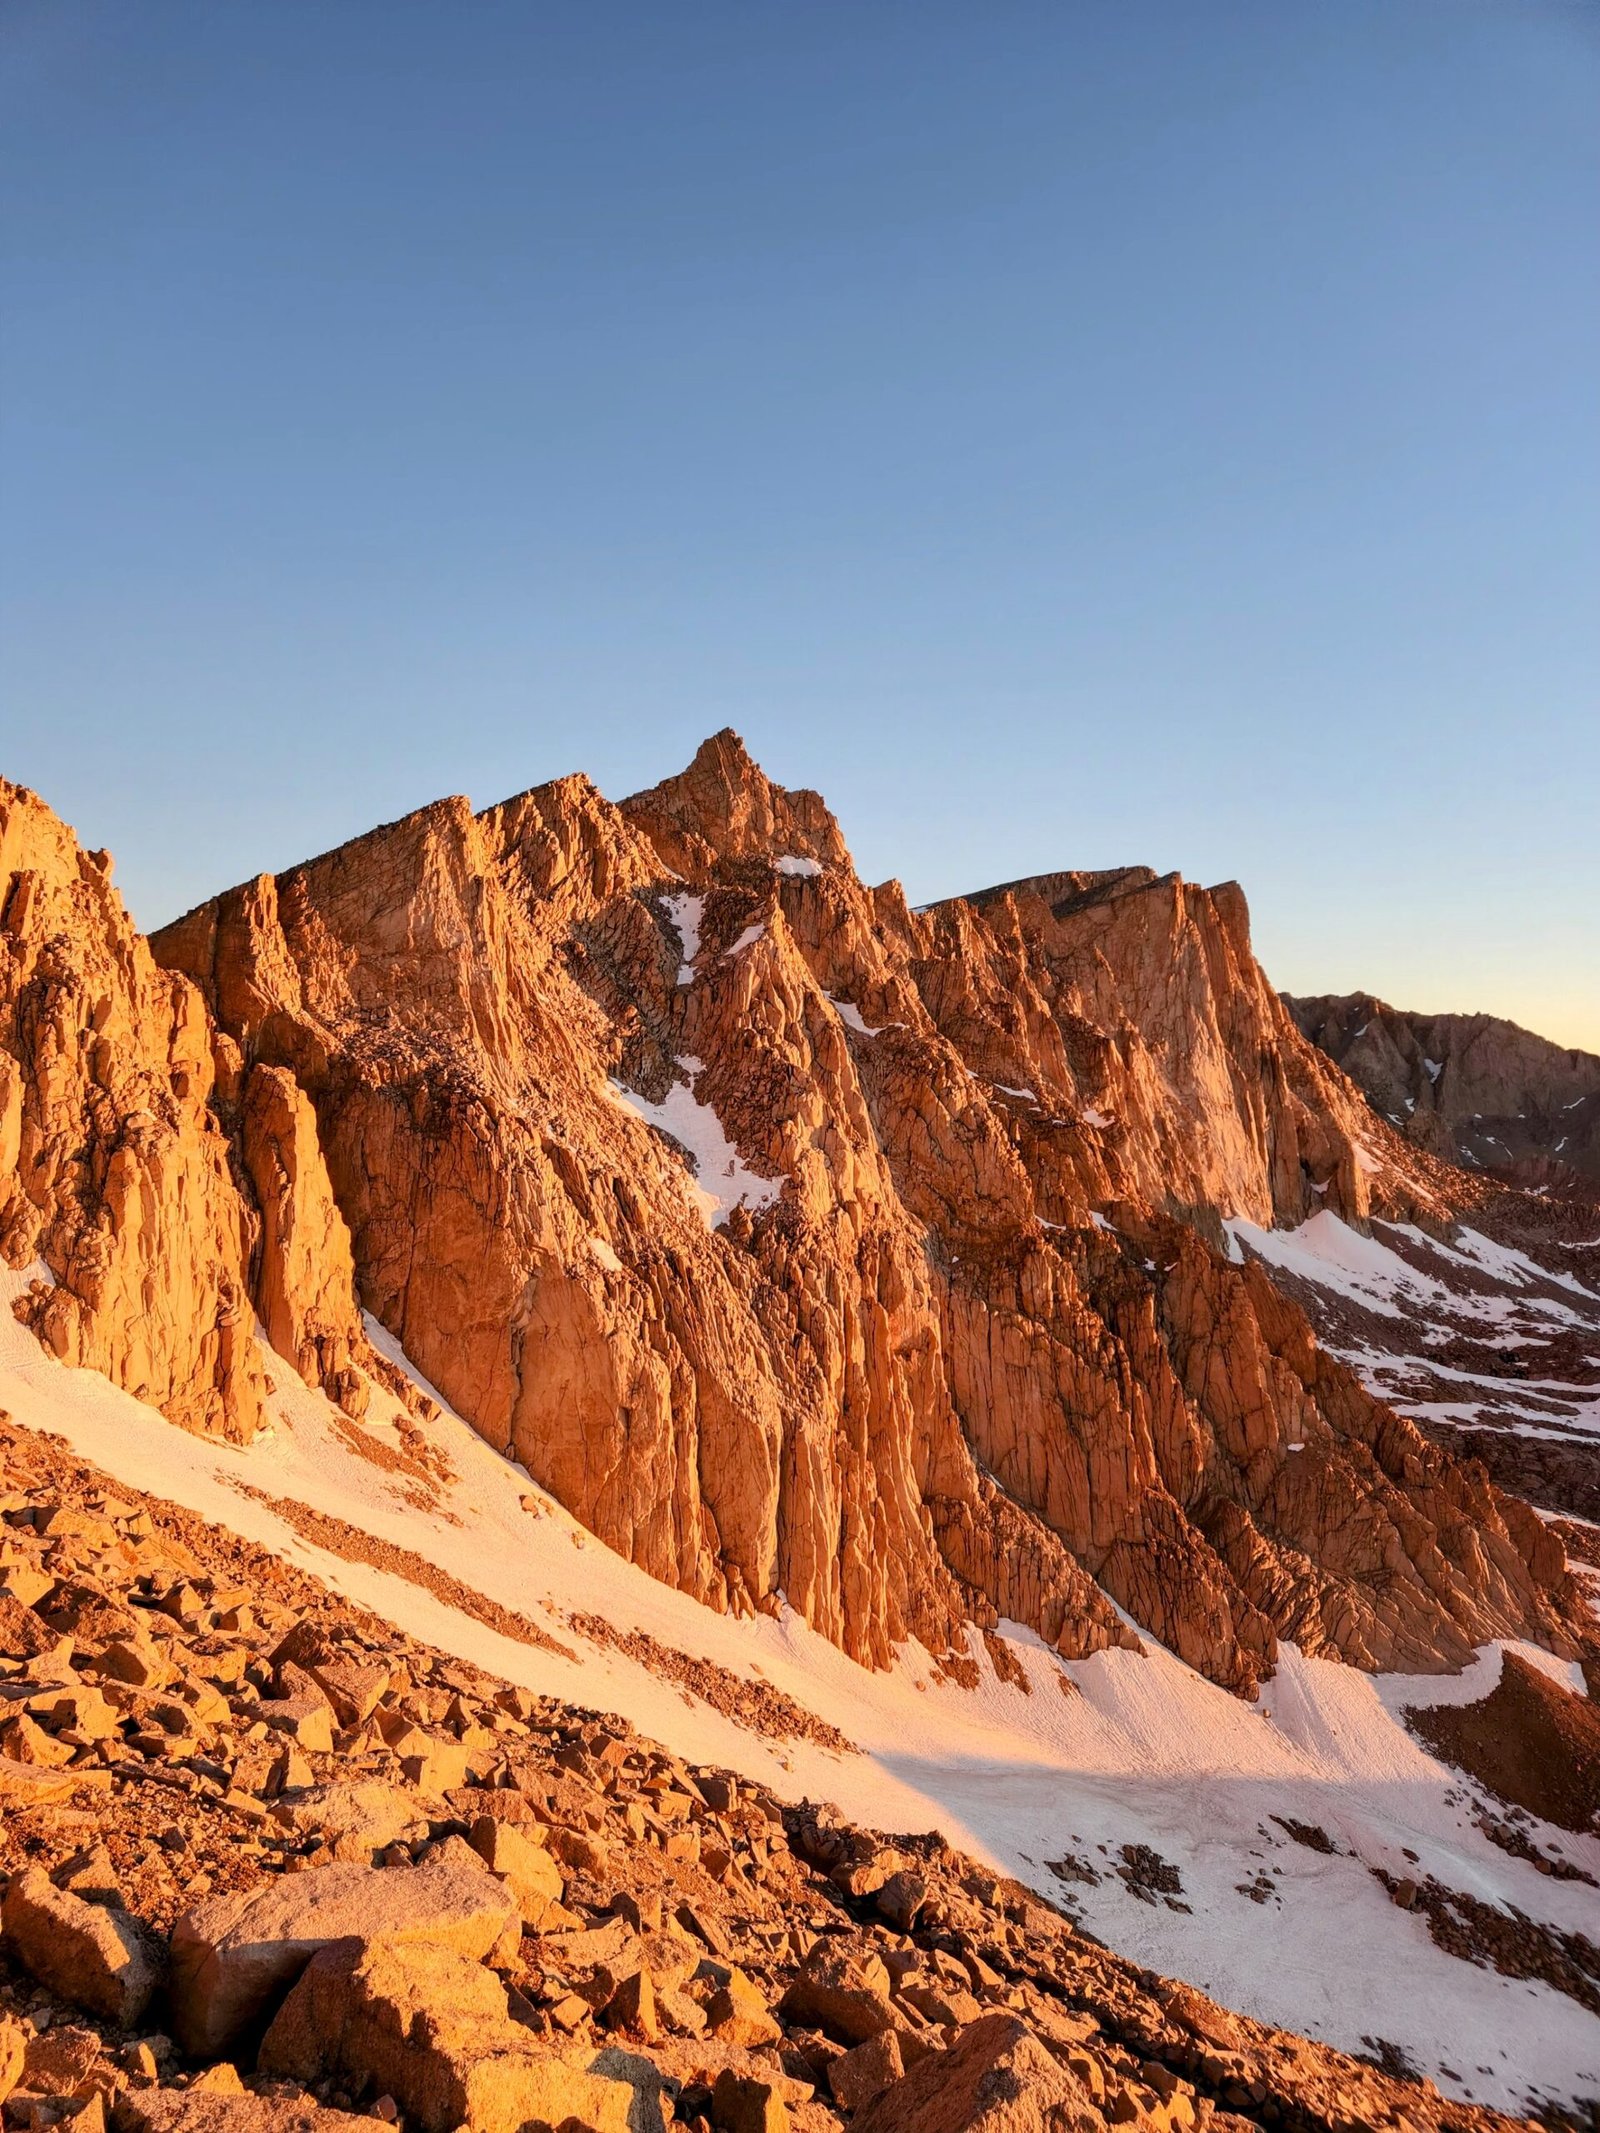
If your timing is right, the sun will begin to crest the horizon as you reach the upper switchbacks or Trail Crest. The “Alpine Glow” turns the granite peaks of the Sierra Nevada into a fiery orange. Apart from reaching the Whitney summint this was easily the best part of the trail, it was such a magical moment watching the sun rise above the horizon and smother the mountains in orange glow. To time this perfectly get up 2-3 hours before sunrise (the timing will depend on your hiking speed) and hopefully you will make it to trail crest or thereabouts for sunrise.
Sequioa National Park
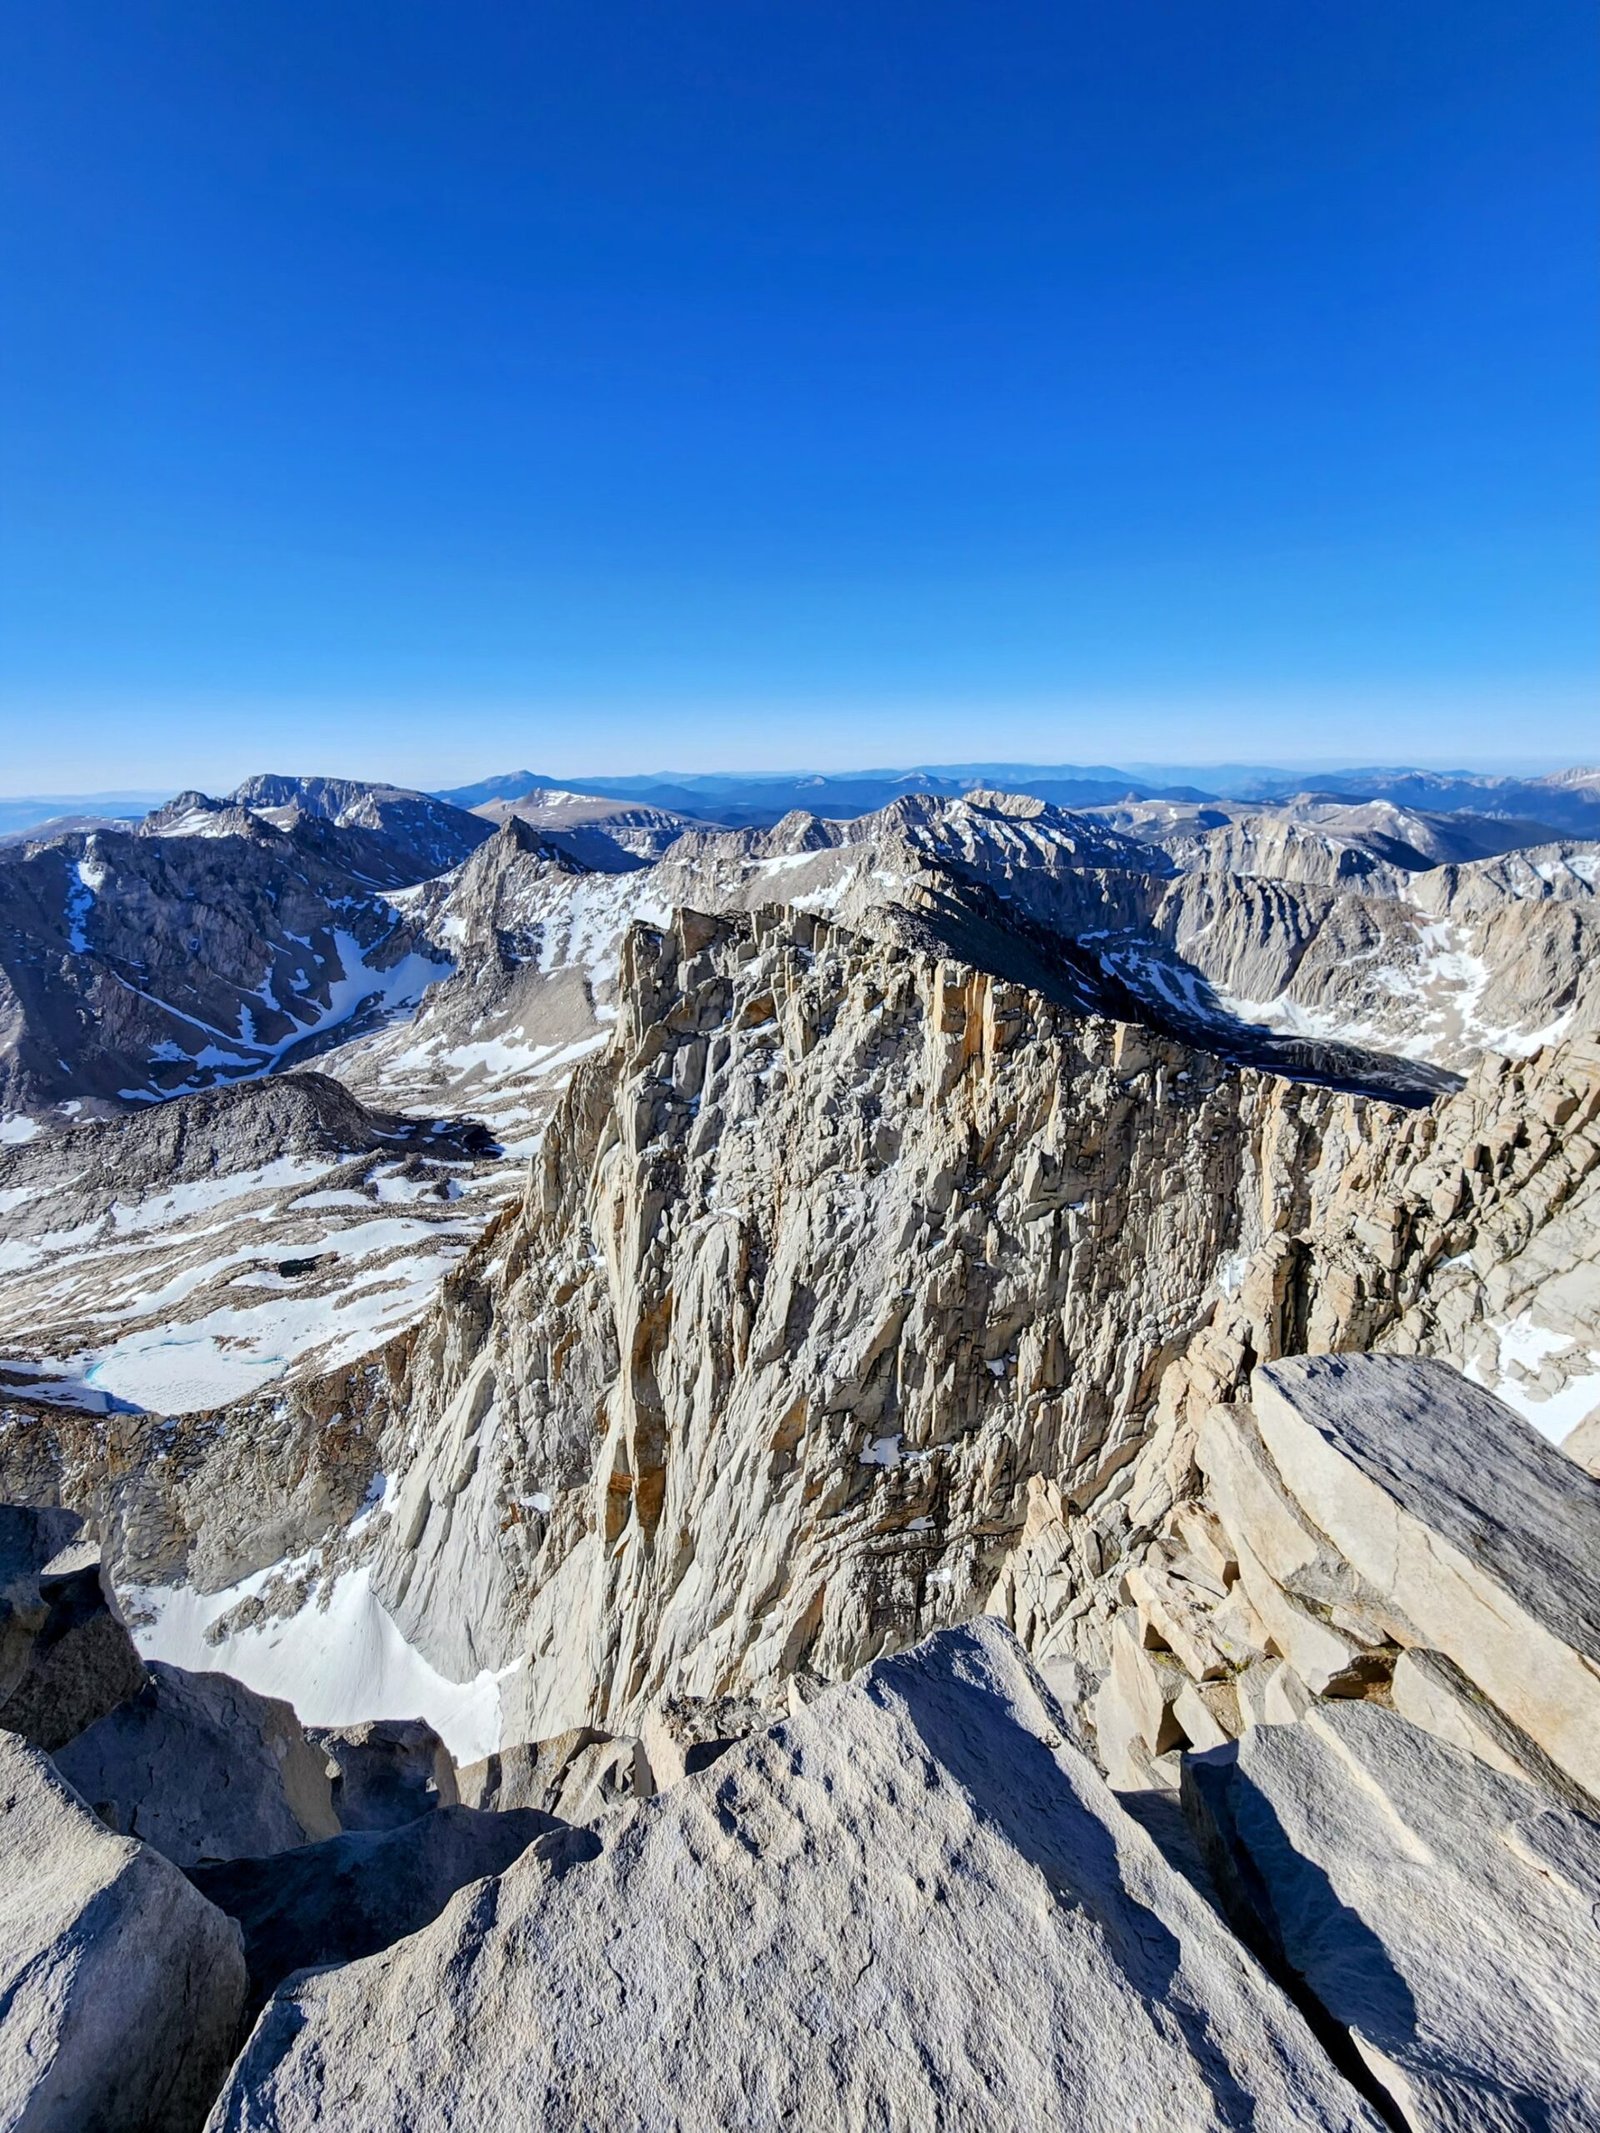
Leaving Trailcrest behind you will enter Sequioa National Park where you have fantastic views looking into the park as we pass around the other side of the mountain peaks making our way to whitney summit that is less than 2 miles away now. As you make your way along the rocky terrian to the whitney summit you will pass by the windows which are jagged gaps in the mountains where you can peek into the valleys below and get some awesome photos with the natural rocky frame.
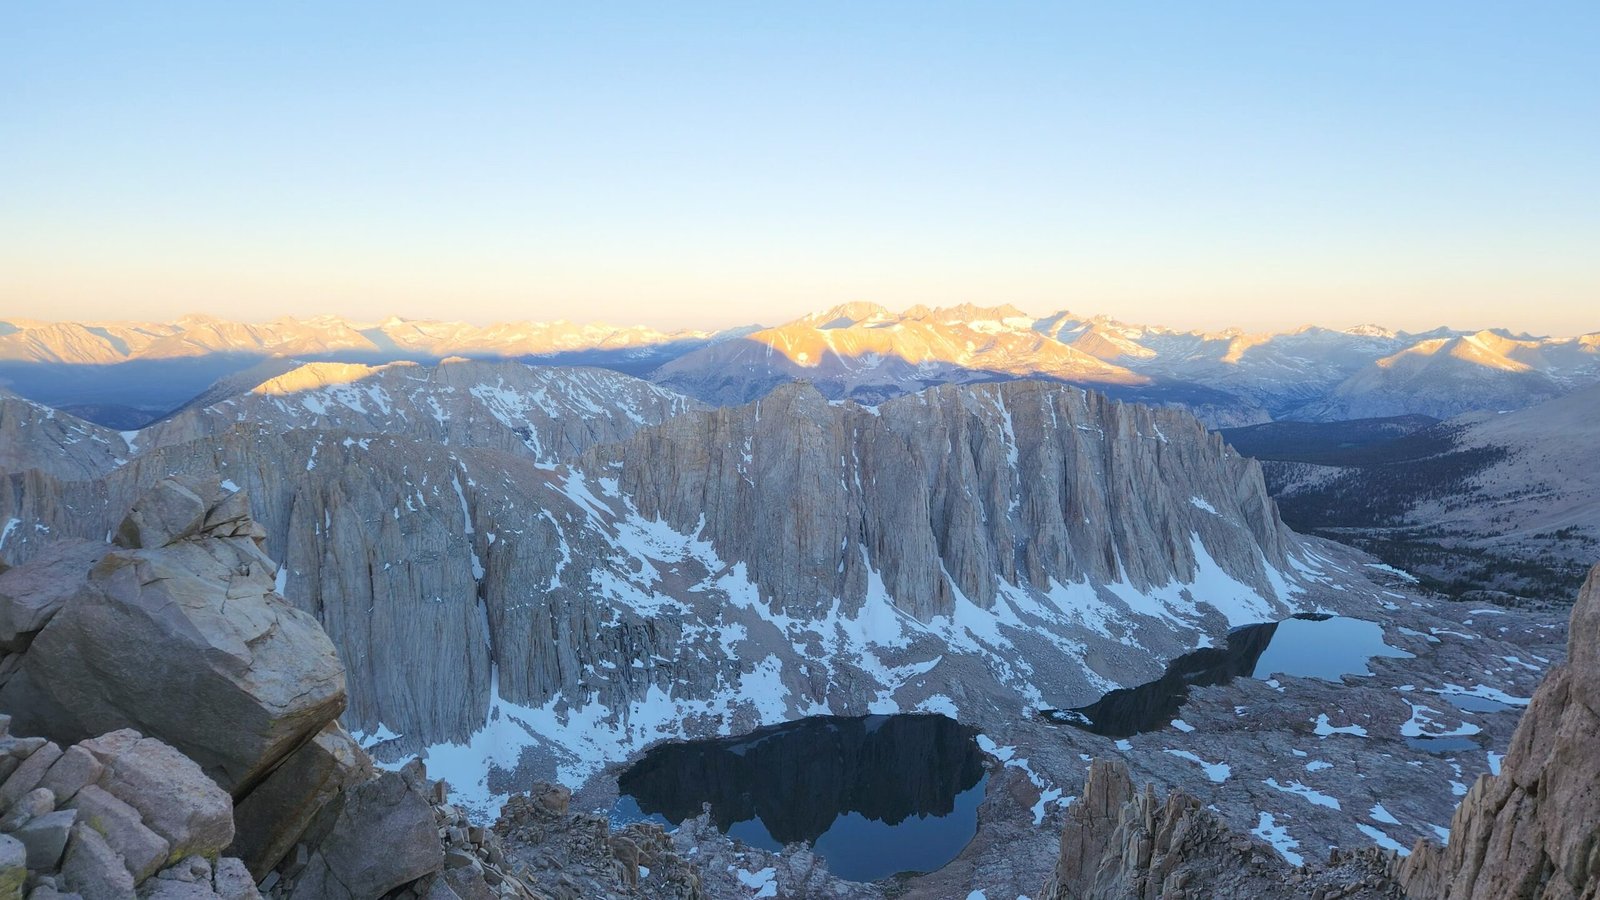
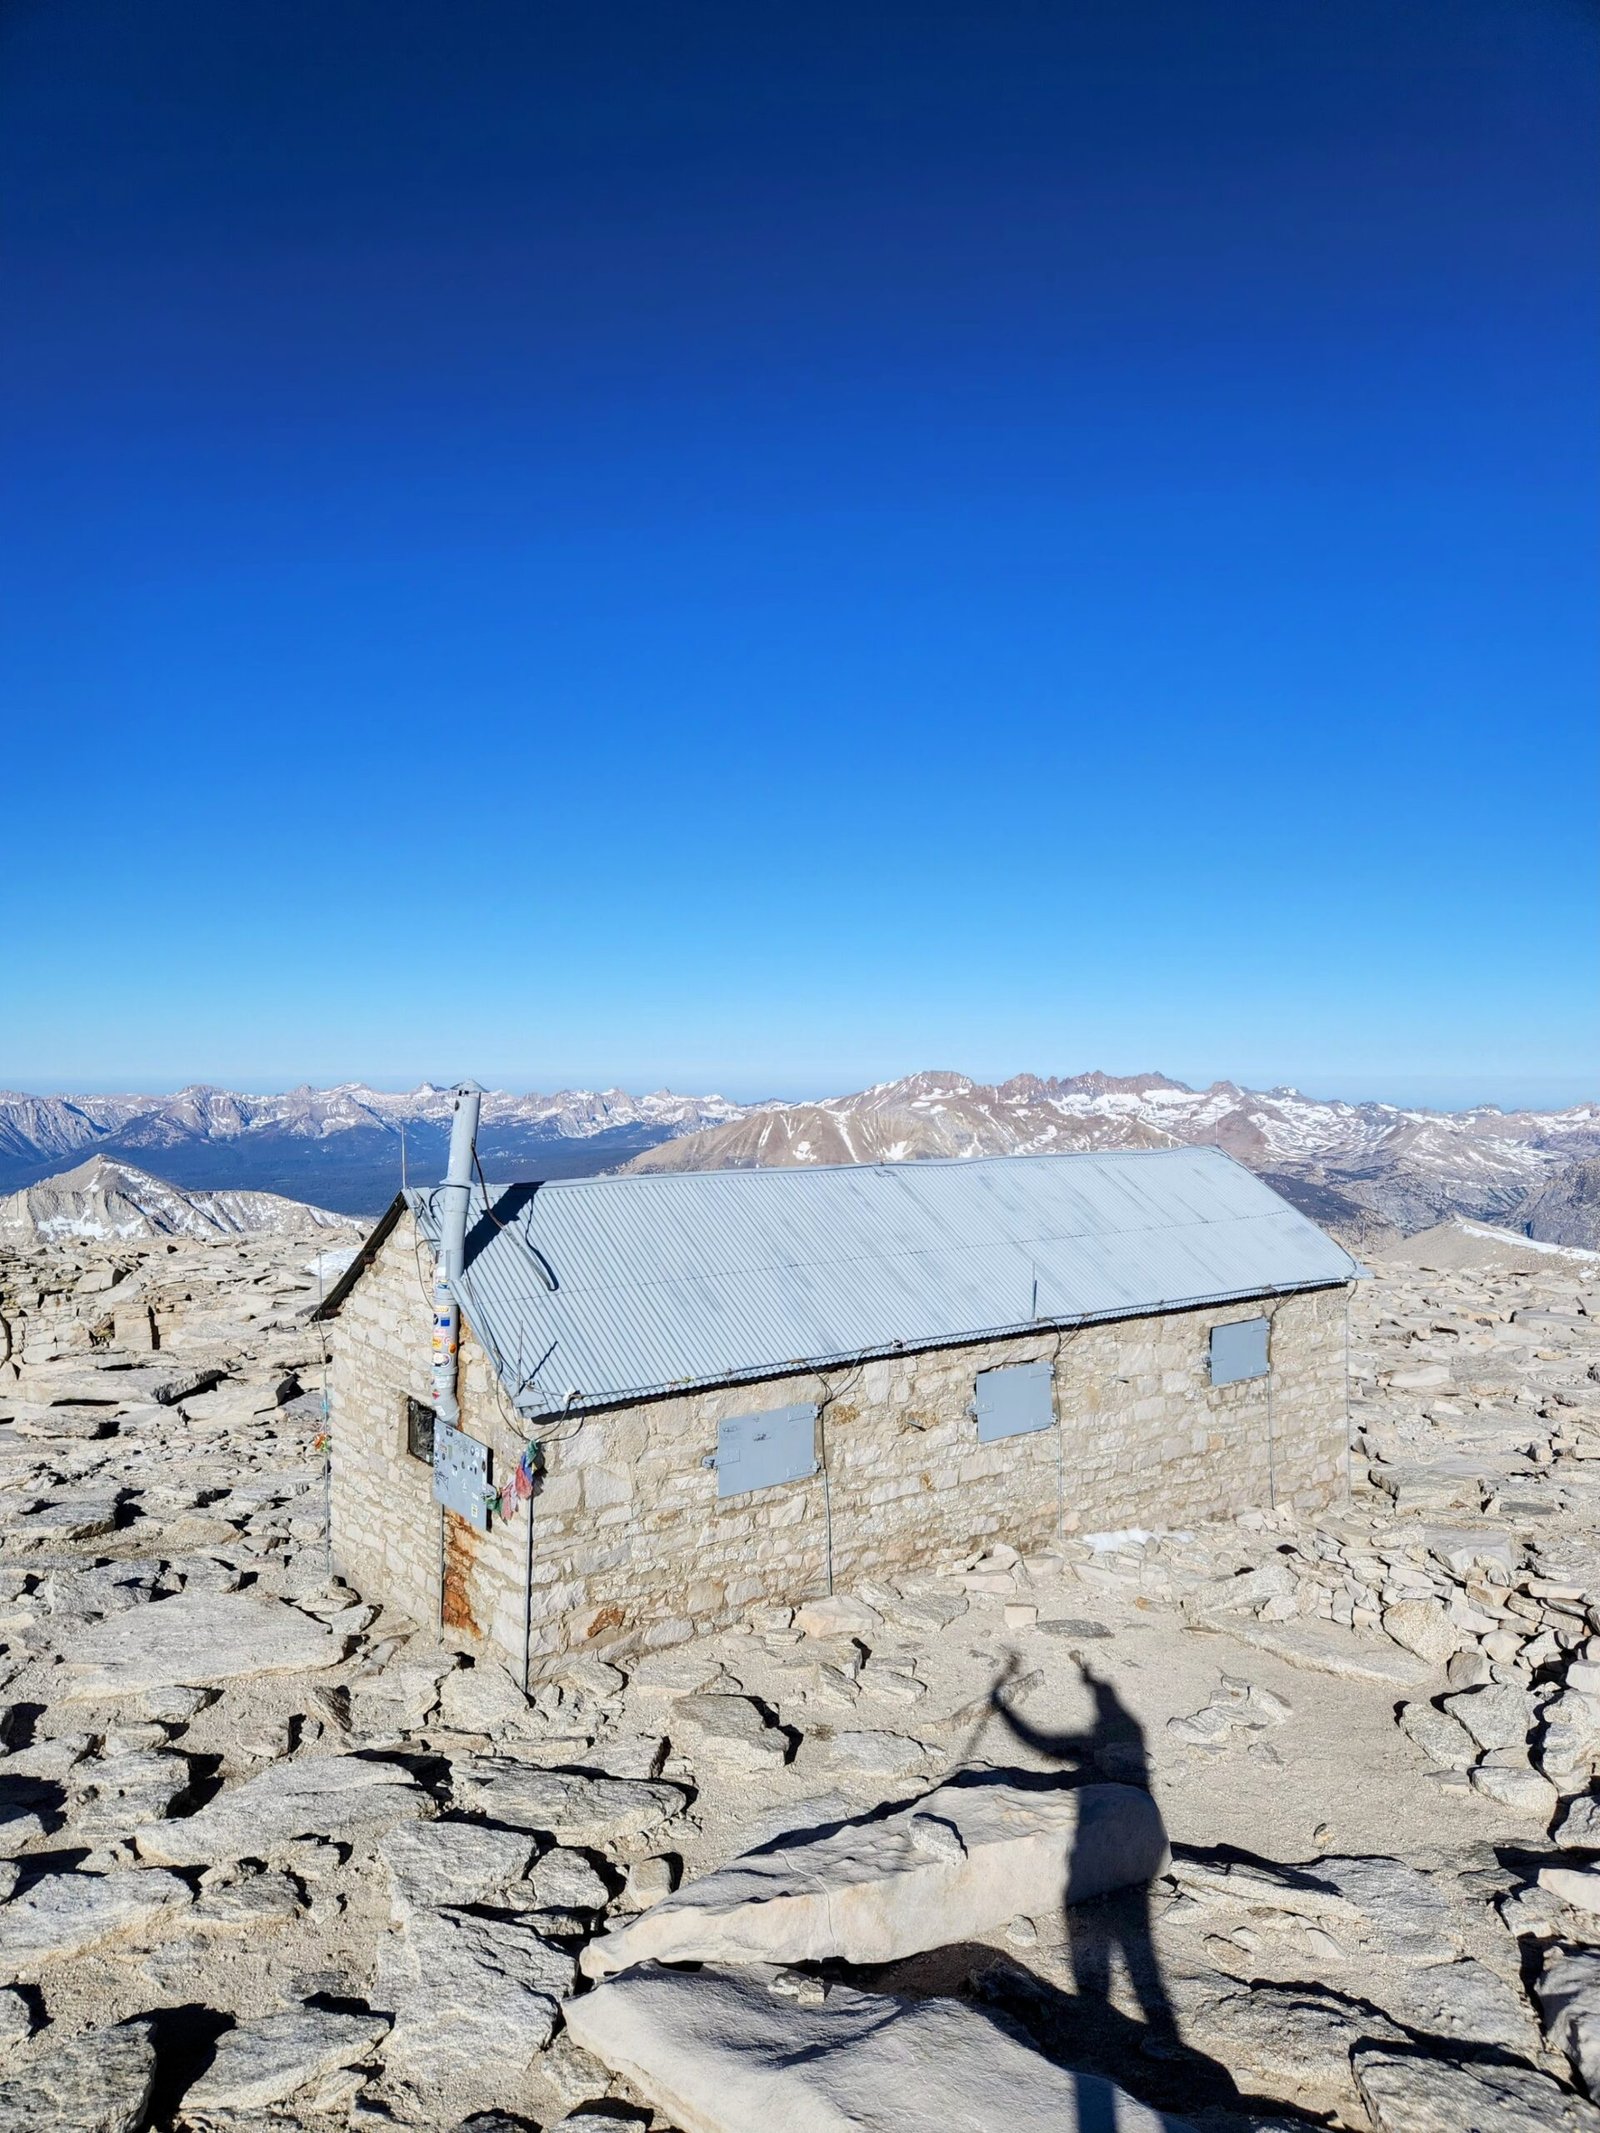
Mt. Whitney Summit
From the summit you get panoramic views of the Great Western Divide and all the way back down where you started at whitney portal. The sense of accomplishment is profound as all the hard work and planning has come to this point as you stand at the highest point in the lower 48!. Don’t forget to sign the book at the Mt. Whitney Shelter before hiking back down. The journey down is a long, knee-jarring descent, but its’ all down so it only took us about 6 hours to make it back to whitney portal.
Where/What To Eat & Drink
For the hike itself, focus on packing calorie dense, high carbohydrate foods that are easy to eat on the move, like energy bars, nuts, meat sticks, and dried fruit. We always like to bring along electrolyte tablets to put in our water bottles to help replenish essential minerals lost through sweat. Once you complete the descent (or before the hike), head straight to the Whitney Portal Store for one of their famous giant pancakes or a satisfying burger. Back down in Lone Pine, local spots like the Alabama Hills Cafe & Bakery offer hearty breakfasts, while the Seasons Restaurant or Merry Go Round are popular options for post-hike comfort food.